How to Assemble RTA Kitchen Cabinets: A Step-by-Step Guide
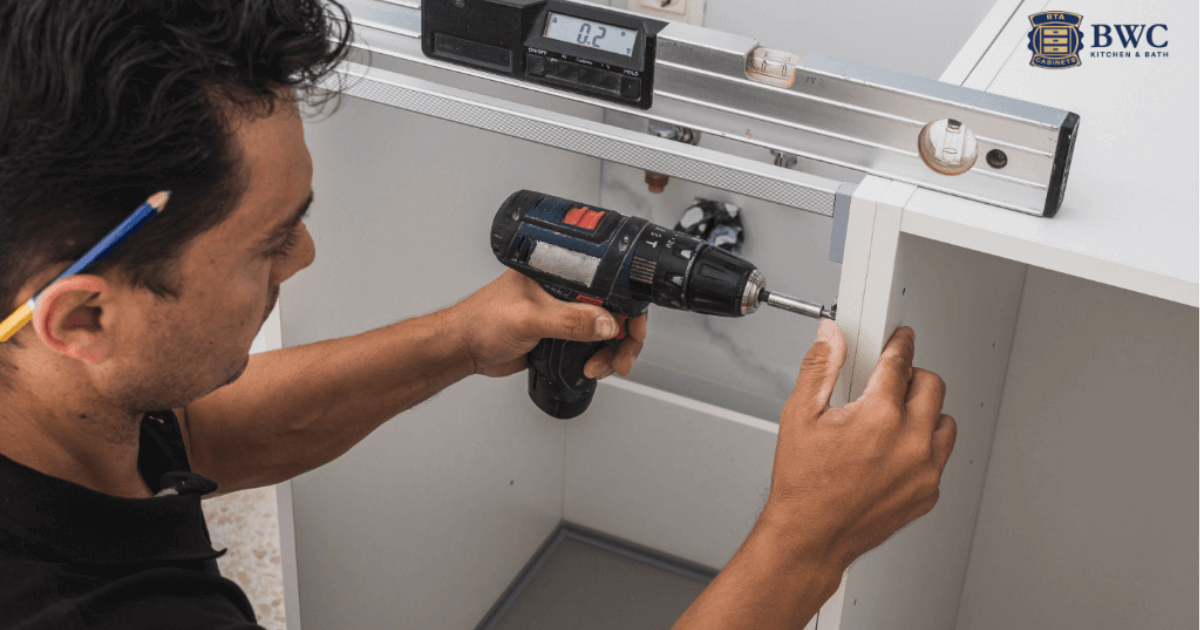
Table of Contents
Building kitchen cabinets on your own? Yeah, it sounds super overwhelming at first. But trust me—it’s totally doable! With the right tools, some patience, and clear instructions, you’ll be good to go. Whether you’re assembling RTA cabinets or fixing up the ones you’ve got, learning how everything fits is going to save you so much time and money (plus a ton of frustration).
This article is for you. Read on to understand everything about gathering your materials and setting up your space to avoid the usual mistakes. And when it’s time to call in the pros? We’ll help you figure that out, too. You got this!
Essential Tools and Materials for Assembling RTA Kitchen Cabinets
First off, to get your kitchen cabinets assembled like a pro, you will need a list of tools and materials that we have listed below.
Screwdriver or Drill
One thing you need when assembling RTA kitchen cabinets is a good screwdriver, or even better, a power drill. This will take some time, as you are dealing with a number of screws, so having a drill will probably speed up the process a lot. Choose one with adjustable torque settings to avoid overtightening and ruining the materials of the cabinet. When using a manual screwdriver, follow the types of screws indicated (flathead and Phillips, for example). A #2 Phillips drill is typical for the majority of RTA cabinets.
Rubber Mallet
One of the best tools when assembling cabinets is a rubber mallet. It allows you to delicately nudge parts into position, unlike a traditional hammer, which might break the surface, scratch, or dent.
This will help when you are nesting panels tightly together or inserting wooden dowels. With even small taps and a mallet, you can get a tight, crisp finish without the possibility of doing aesthetic damage.
Wood Glue
While most RTA cabinets are obviously designed to be kept together with screws, cam and lock assembly, a little wood glue on joints doesn’t hurt. When you apply glue to the dowels, wooden pegs, or edges where the panels touch, you are ensured of longer-lasting cabinets. You don’t want it to look messy or have it prevent any of your finishing from adhering, so make sure to wipe off any excess glue before it sets up.
Clamps
Clamps are the extra pair of hands when assembling. When using wood glue, they are absolutely essential to keep the pieces stuck together while the glue cures. Especially for attaching larger panels or face frames, clamps will square everything up and hold it stable, even without any adhesive. If your cabinets are larger or bigger, bar clamps and corner clamps are both great options too.
Allen Wrench (If Included)
Some RTA cabinet kits come with these unique fasteners that require you to tighten them with an Allen wrench (a.k.a. hex key). While these are often provided in the pack, it’s a handy idea to have your own in case you want a more comfortable trigger or it goes missing. Cam locks or other specialty bolts that you won’t be able to tighten with a screwdriver are generally secured with an Allen wrench.
| Tool/Material | Purpose |
| Screwdriver/Drill | Tighten screws efficiently |
| Rubber Mallet | Gently fit panels without damage |
| Wood Glue | Strengthen joints and increase durability |
| Clamps | Hold pieces together while glue dries |
| Allen Wrench | Secure specialty fasteners (if included) |
Pre-Assembly Preparation for RTA Kitchen Cabinets
Now that you know what tools and materials you’ll need, let’s proceed to the pre-assembly setup below.
- Prepare the floors and walls: Instead of installing cabinets on the flooring, place them on the subflooring. Before the installation, sweep and vacuum the area to ensure that there are no stray shavings or pieces of wood that could upset the balance of your cabinets.
- Complete the plumbing and electrical work: Make sure that all of the plumbing and basic electric work is finished. Moving a wire or pipe requires cutting into one of your custom cabinets, which is the last thing you want.
- Take three measurements: The saying “measure twice, cut once” may be familiar to you. But we say, “Measure three times.” You can never take too many measurements. Measurements are crucial for cabinet placement. Your kitchen cabinets shouldn’t feel difficult to open or hang too low.
- Assemble first: Before the installation procedure starts, put together the majority of the cabinets. This will help you obtain precise measurements and begin envisioning the placement of each element.
- First, install the uppers: To avoid the base level getting in the way of your efforts to hold and secure the heavy upper sections, it is best to install the upper level first.
<H2>: Step-by-Step Instructions to Assemble RTA Kitchen Cabinets
With the pre-assembly prep ready to go, let’s go step-by-step into the assembly instructions below.
1. Attach the Cabinet Sides to the Bottom Panel
Lay the bottom panel flat on a spotless surface to begin with. The pre-drilled holes on either side of the bottom panel should line up with the cabinet side panels. Depending on your cabinet’s hardware system, use wood glue (if advised) and use screws or cam locks to firmly fix the sides. Before tightening all the way, make sure everything is square.
2. Install the Back Panel
When the sides are fastened, slide the back panel into position. The back panel of most RTA cabinets fits into grooves. Make sure it’s straight, then fasten it with screws or nails around the edges. This procedure gives the cabinet frame more structural solidity.
3. Secure the Top Panel
As with the bottom panel, place the top panel between the side walls. Once more, line it up with the holes that have already been drilled, use adhesive if necessary, and secure with the proper hardware. Before you tighten everything into place, make sure that every corner is square.
4. Install the Face Frame (If Included)
If your cabinet has a face frame, line it up with the cabinet box’s front borders. After applying wood glue, clamp the frame down to ensure a tight fit. Secure the face frame with screws from within the cabinet, taking care not to fracture the wood.
5. Mount the Drawer Glides and Shelves (If Applicable)
Now is the right time to install any interior components. As directed by the manufacturer, attach the drawer glides to the side panels. Place the shelves on top after inserting shelf pins into the pre-drilled holes at the appropriate height. Make sure everything moves smoothly and is at the correct level.
6. Attach the Cabinet Doors
Mount the doors to the cabinet sides or face frame using the hinges. After installation, you can align the doors uniformly because most hinges are adjustable. Start with screws that are lightly fastened, correct the level and spacing, and then tighten everything firmly.
7. Add Finishing Touches
To complete the basic framework, add a trim, or hardware, like knobs and pulls. Examine the cabinet for stability and alignment, remove any extra glue, and check for loose connections. Now that you’re finished, take a look at your masterpiece!
Common Mistakes to Avoid When Assembling RTA Kitchen Cabinets
At first sight, assembling RTA kitchen cabinets may appear simple. However, making mistakes is human. If you make a few mistakes, they make the process incredibly difficult.
- Ignoring the Instructions
Many do-it-yourselfers make the mistake of assuming that every cabinet fits together in the same way. In actuality, different manufacturers employ various mechanisms. Some employ brackets or dowels, while others use cam locks. Before beginning, always spend a few minutes reading the entire instruction manual.
- Hardware Loss or Confusion
It’s simple to use the incorrect cam fitting in the wrong place or misplace a screw. These errors can result in instability or noticeable gaps. To keep hardware organized, use labeled containers.
- Forgetting to Check for Squareness and Levelness
If your panels are not precisely square or your cabinets are not level, you will encounter problems while installing drawers, doors, or aligning several cabinets side by side. At every stage of assembly, make sure to use a carpenter’s square and level.
- Power Drills can Help or Hinder Overtightening Fasteners
Overtightening a screw can strip the hole or cause the material to split, especially on particle board or MDF. Once the screw is secure, cease using the torque levels that can be adjusted.
- Ignoring Test Assemblies or Dry Fits
Before gluing or fastening everything down, do a dry run of the assembly. This step helps keep all the parts in place as planned. Also, it can help with the early detection of warped panels or misaligned holes.
Expert Tips for Assembling RTA Kitchen Cabinets Efficiently
Want to speed up your installation process? The following tips can help. You can then have results that appear as though a skilled carpenter put them in.
- Workspace organization done right: Clear a broad, level area, ideally a sturdy table or padded workbench. Before you begin, arrange all of your panels, hardware, and equipment. Sort related items into groups and make sure the box is complete.
- As you unpack, label each component: Using painter’s tape and a marker, label each panel with the terms “left side,” “top,” “face frame,” and so on, following the layout in your handbook. This reduces misunderstandings and keeps pieces that look alike from being confused.
- Utilize clamps to maintain alignment: Clamps are necessary for glue-ups. They use a face frame fastening to keep everything square and tight while you apply or let the adhesive dry. It can be very beneficial to have a few corner clamps and bar clamps on hand.
- Pre-drill pilot holes: Many RTA base cabinets are pre-drilled. If yours are not, you might need to add drilling-intensive hardware or handles. Small pilot holes should always be pre-drilled to prevent material breaking or cracking.
- Avoid working alone unless absolutely necessary: Having a second pair of hands helps. Teamwork makes the dream work. With help, you expedite the process. Lifting heavy frames or aligning huge panels becomes easy. Take help, even if the instructions state that it is a one-person job.
- Take occasional pauses: Do this to verify alignment by standing back and examining your cabinet from various perspectives. Checking for gaps, uneven panels, or subtle tilts for a few minutes can save hours of work later.
When to Hire a Professional for RTA Kitchen Cabinet Installation
Do-it-yourself projects are rewarding only when they do not cause stress. There are times when taking professional help is the best option. You can avoid expensive errors and create a beautiful look for your kitchen.
- Your kitchen’s dimensions are tricky: For beginners it is challenging to align cabinets correctly. It can happen if your walls or floors are uneven, sloping, or out of square. This problem is common in older homes. An expert installer has the equipment and skills necessary to make accurate changes.
- You’re altering the electrical or plumbing system: You need to be precise while drilling through cabinets to fit around outlets or pipes. A single incorrect cut can irreparably damage the cabinet. Experts are aware of the precise locations and methods for making changes. They avoid structural damage.
- You lack the necessary time or energy: Even for seasoned assemblers, organizing and putting up cabinets in a kitchen can take several days. Conversely, a professional can be a huge stress reliever, whether you’re balancing work, family, or a stressful renovation schedule.
- You want a luxurious, immaculate finish: Professionals can get flawless joints, aligned doors, and clean finishes. These enhance the finished appearance if you’ve invested in high-end cabinets and want everything to seem showroom-perfect.
- You’re already feeling overwhelmed: If you start assembling and feel overwhelmed, it’s better to stop and get assistance rather than risk making expensive mistakes.
Conclusion
Putting together RTA kitchen cabinets might seem like a difficult task at first. However, it’s entirely doable with the appropriate mindset. You need the right equipment and preparation. If you are methodical and follow each step accurately, you can do it smoothly.
Just keep your workspace organized and avoid typical pitfalls. You’ll be well on your way to creating sturdy, fashionable cabinets that last for many years. Take your time. Make sure your measurements are correct, and don’t be afraid to ask for assistance when you need it.
FAQs
What tools do I need to assemble RTA cabinets?
To build RTA base cabinets, you’ll need a few basic tools. A screwdriver or drill is a must. You’ll also need a rubber mallet, wood glue, and clamps. Sometimes, an Allen wrench is required too. These tools help hold everything together and make sure the fit is solid. Always check the manufacturer’s list to see if any special tools are needed.
How long does it take to assemble RTA cabinets?
How long it takes to assemble depends on your experience and how complex the cabinet is. Usually, one cabinet takes about 30 minutes to an hour. But if you’ve done it before or have everything sorted, you could have a whole kitchen done in a day or two. Pros can probably finish faster since they’ve got all the right tools.
Are there any video tutorials for assembling RTA cabinets?
Yep, lots of manufacturers and DIY experts offer step-by-step video guides for assembling RTA cabinets. You can find helpful tips on YouTube and home improvement sites. These videos show you exactly what to do, which can be super useful, especially if it’s your first time putting cabinets together.
How do I attach cabinet doors and drawers?
To put on the cabinet doors, just line up the hinges with the pre-drilled holes and screw them in. For the drawers, slide the drawer box onto the glides, making sure it fits smoothly. You might need to adjust the hinges or glides a bit for the perfect alignment. Some systems even have quick-release clips, making it easier to install and remove.
Do RTA cabinets come with instructions?
Yeah, pretty much all RTA base cabinets have instructions with pictures and steps to follow. Some even give you QR codes or links to videos for extra help. Before you jump in, though, it’s smart to go over the instructions one more time. You don’t want to miss anything, like strange hardware or steps that need to be done in a certain order.
What’s the easiest way to assemble RTA cabinets alone?
The easiest way to put together RTA base cabinets by yourself is to get all your pieces and tools ready before you start. Make sure you’re working on a flat, sturdy surface, and stick to the instructions. Use clamps to hold things in place while you work, and for the bigger sections, try assembling them standing up. That way, you won’t have to lift as much, and everything stays lined up better.


 Sales:
  Customer Service: