

 Sales:
  Customer Service:
How to Paint or Stain Unfinished Cabinets: A Pro’s Step-by-Step Guide

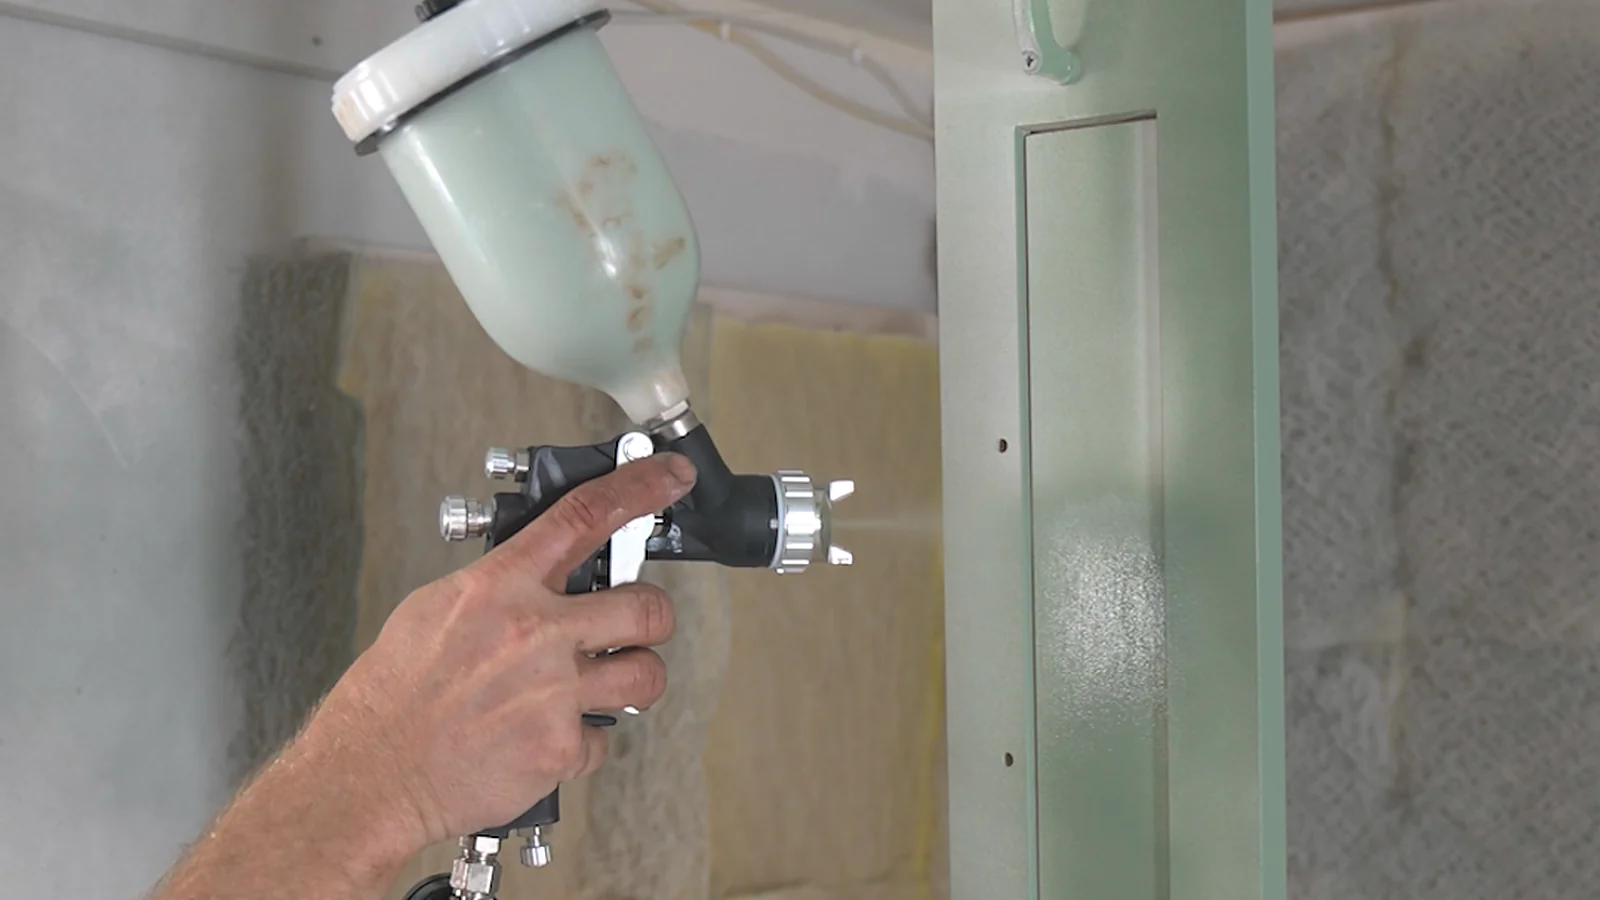
To paint unfinished cabinets, spray two coats of a stain-blocking primer, sand lightly with a fine-grit sponge block, then spray two top coats of cabinet-grade water-based enamel 15 minutes apart. To stain unfinished cabinets, wipe on an oil-based stain with a cotton rag, wipe off all the excess within 15 to 20 seconds, seal with sanding sealer, sand with steel wool, then spray 2 to 3 coats of lacquer. Because the doors arrive raw, there is no old finish to strip and no prep sanding to do, and a $100 cup spray gun at 35 to 60 PSI produces a factory-grade result in a weekend.
That is the short version. The rest of this guide covers both methods in detail, how to choose between them, and the spray-gun tricks that separate a homemade-looking finish from a professional one. You do not need a thousand-dollar rig or a workshop full of equipment: a $100 cup gun and the right order of steps produce a finish that looks factory-done.
In this guide:
- Why unfinished cabinets are the easiest cabinets to finish
- Paint or stain: how to decide
- Do you have to sand unfinished cabinets first?
- Tools and supplies (under $250)
- How to stain unfinished cabinets, step by step
- How to paint unfinished cabinets, step by step
- Spray-gun technique for a factory finish
- Do you paint the inside of the cabinets?
- Finishing unfinished vanity cabinets
- How long it takes
- What it costs
- FAQ
Why Unfinished Cabinets Are the Easiest Cabinets to Finish
Refinishing old cabinets means degreasing, stripping, and sanding off the existing finish before you ever open a can of paint. Unfinished cabinets skip all of that. The doors arrive raw and ready for finish, which is exactly what people are looking for when they search for how to paint cabinets without sanding off an old finish.
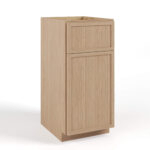
Wood quality decides how good the final finish looks. Our unfinished shaker cabinets use five-piece shaker doors in solid birch with a quarter-inch panel, solid birch face frame rails, and a 1/2-inch plywood box with pre-drilled hinge holes and soft-close, three-way adjustable hinges. Solid birch takes stain evenly and paints smoothly. Stained well, birch passes for mahogany, a look that would otherwise cost thousands.
What Arrives in the Boxes, and Why That Helps You
Each cabinet ships flat, in three parts: one box with the frame and door (plus the drawer front on base cabinets), one box with the cabinet parts, and a small hardware box holding every hinge, screw and bracket. Do not lose the small box. Nothing assembles properly without it.
Flat-pack is a real advantage when you are the one applying the finish:
- You finish flat parts, not a finished box. No masking around hinges, no reaching into a corner with a spray gun, no runs where two panels meet at 90 degrees. Pre-assembled unfinished cabinets from a big-box store force you to work around all three.
- Drawer fronts separate from the drawer box, so they get finished flat like the doors and attach afterward with dowels and screws from the inside.
- Cut the shrink plastic only along the groove on the back of the frame. Cutting anywhere else can nick the surface you are about to finish.
- Inspect every part before you finish it. A ding on a hidden cabinet-to-cabinet side does not matter. A ding on a finished end does, and it is far easier to request a replacement part before you have spent a weekend staining it.
- Finish first, assemble at least 24 hours later. That order is not optional, and it is the reason this project fits in a weekend.
Two Shop Notes About the Wood
First, plywood takes stains lighter than solid birch does, so a plywood panel and a solid birch door can land on slightly different tones from the same can. Always test your stain on a scrap or on an unfinished shaker sample door before you commit a whole kitchen to a color.
Second, the interior faces arrive with a natural UV coating: moisture-resistant and wipe-clean, so wet dishes leave no marks. Stain will not take on a UV-coated face and will not come off it either, so keep your workspace clean and finish the show side only.
What Buying Unfinished Actually Saves You
Be clear-eyed about this, because it is not mainly a unit-price story. Unfinished is an entry-tier line, but several painted lines sit in the same price band, so do not assume unfinished is automatically the cheapest cabinet in the catalog. What buying unfinished actually buys you is this:
- No custom-color markup. You pick any color that exists, in any sheen, for the price of a gallon of paint.
- No special-order wait. Custom colors at big-box stores can take up to 12 weeks. These arrive in 7–10 business days, nationwide in the lower 48.
- Wholesale pricing, saving up to 40% versus big-box stores, plus a price-match guarantee if you find the same product cheaper.
- The only practical route to a two-tone kitchen without paying custom-shop prices, which we come back to below.
Paint or Stain Kitchen Cabinets? How to Decide
Both finishes work beautifully on raw birch. They suit different people, different kitchens, and different tolerance for pressure.
| Factor | Stain | Paint |
|---|---|---|
| Look | Natural wood grain; stained birch can pass for mahogany | Any color; solid, uniform surface |
| Working speed | Fast-drying, you must keep moving | Relaxed pace, coats dry on your schedule |
| Forgiveness while you work | Reactivates, so dried spots are fixable | Sands back easily between coats |
| Flaw visibility | Grain hides small marks | Dark colors show every flaw; white hides most |
| Everyday wear | Color sits in the wood, so scuffs read as wood, not as damage | Chips at door edges and corners show as a different color underneath |
| Touch-ups | Re-wet the spot with a stained rag and blend | A chip needs filling and respraying to disappear; spot repairs tend to show |
| Supplies needed | Stain, sanding sealer, lacquer, retarder | Primer, enamel, sponge blocks |
| Best for | Wood lovers, warm traditional kitchens, fast workers | Color-driven designs, modern kitchens, methodical first-timers |
Choose stain if you love wood grain and can commit to working quickly. Oil-based stain dries fast, especially in humid climates, so each piece has to be finished in one continuous pass, edge to edge. It cannot be done piece by piece.
Choose paint if you want a specific color, or if you are a first-timer who likes to take your time. If you tend to work slowly and methodically, paint is the better choice. Stain will not wait for you.
Or do both. A white painted upper over a custom-stained base is the look everyone wants for 2026, and finishing unfinished cabinets yourself is the only practical way to get it without custom-shop pricing. If you want the design side first, see our guide to two-tone kitchen cabinets, then come back for the method.
Do You Have to Sand Unfinished Cabinets Before Painting or Staining?
On the doors, you never sand off a finish, because there is not one. Every door arrives completely unfinished and ready for paint or stain – that is the entire point of starting unfinished, and stripping an old finish is the step that eats a full day when people refinish existing cabinets.
The included side panels are the one exception: they arrive UV coated. Any side that will stay exposed once the run is installed needs one of two things before finishing – an unfinished skin panel applied over it (the matching skin SKUs are listed in each cabinet category on the site), or a scuff-sand of the UV coating so the finish can bond.
You do check the raw wood, and you sand between coats. Standard preparation for bare interior wood is a medium grit of 100 to 150 for any real blemish, then 180 to 220 grit to even out the surface, sanding with the grain and wiping the dust off before you finish. These parts arrive ready to paint or stain, so in practice you are checking rather than starting from scratch: run your hand over each face and give one light pass with a fine-grit sponge block anywhere you feel a raised patch, a nick, or a rough edge.
Two rules while you do it. Use a sponge block rather than a folded sheet, which slips and rounds over the crisp edges of a shaker profile. And stay light on the profile edges and corners, where any abrasive cuts fastest.
Then comes the sanding that matters most, between coats: a light pass with a sponge block after primer, or steel wool after sanding sealer, which will not cut through stain the way sandpaper does.
What You Will Need (Under $250 in Tools and Supplies)
- Cup spray gun: about $99 online. An airless sprayer is the roughly $400 upgrade, and you do not need it for one kitchen.
- Air compressor capable of 35 to 60 PSI.
- For staining: oil-based wood stain (a thicker-bodied system penetrates the wood better than most stains), a sanding sealer from the same stain system, lacquer topcoat, lacquer retarder, lacquer thinner (mostly for cleanup), cotton rags, fine steel wool.
- For painting: a cabinet-grade water-based enamel, which creates a hard, durable finish and resists yellowing compared with traditional oil-based paints, plus a stain-blocking latex primer, fine-grit sponge sanding blocks, paint strainers at about $0.95 each, mixing cups with ratio charts, and stir sticks.
- Optional for perfectionists: spot glazing putty for seams and small imperfections. It dries in about an hour, turns a deeper shade when it is ready to sand, and sands flat.
- For both: plastic sheeting, tack cloth, disposable coveralls, and cardboard for test sprays.
Pro tip: skip single sheets of 320-grit sandpaper. They slip out of your hand and round over edges. Sponge blocks are easier to control and will not burn through the finish.
What Paint Sprayer Do You Need for Cabinets?
The best paint sprayer for cabinets, if you are finishing one kitchen, is a basic cup gun in the $99 range running off a small compressor at 35 to 60 PSI. It atomizes cabinet enamel and lacquer finely enough for a factory look, and the cup holds plenty for a set of doors.
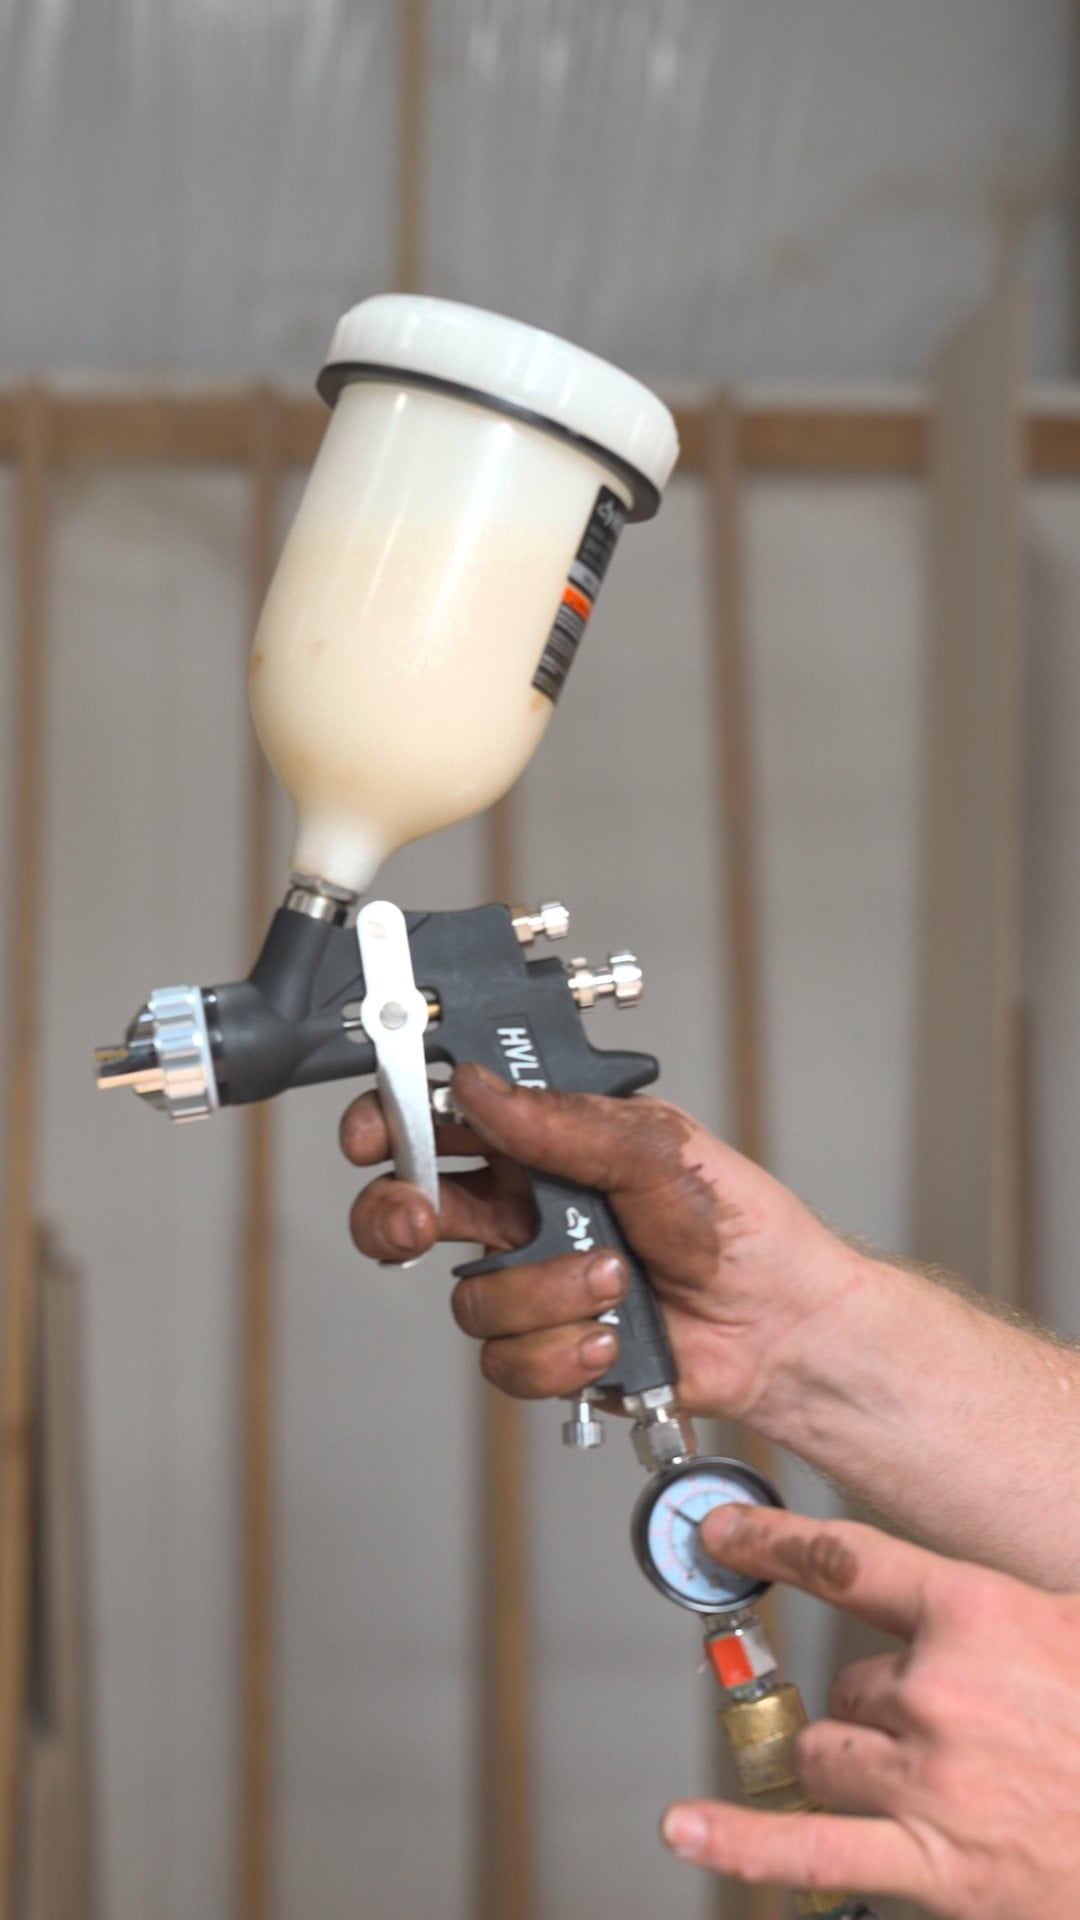
An airless sprayer, around $400, moves more material per minute and is worth it if you finish kitchens regularly. For a single project it is overkill, and the extra tip pressure makes it less forgiving on a five-piece door.
Whichever you use, dial it in on cardboard first and aim for a fan about 6 inches wide. Also expect to run the gun at about half trigger and to adjust the fluid needle until the flow looks even, rather than opening it all the way.
Do You Have to Spray, or Can You Brush and Roll?
Spraying is what gives you the glass-smooth, factory look, especially in the profile of a five-piece shaker door where a brush leaves marks.
That said, cabinet-grade water-based enamel is formulated to level itself, so brushing and rolling are honest options if you do not own a gun. Use a fine microfiber roller on the flat areas and a quality synthetic brush in the profile, thin the paint slightly, and keep every coat thin. What you give up is a little sharpness in raking light and a couple of extra coats.
Stain is different: it goes on by hand, never through a gun. You can brush it on, but a cotton rag gives the more even coat, and only the sanding sealer and lacquer need spraying. So if you are on the fence about buying a sprayer, know that spraying clear coats is far more forgiving than spraying color.
How to Stain Unfinished Cabinets (Step by Step)
- Stir the stain thoroughly. Pigment settles hard at the bottom of the can. Stir until the stick comes up clean, and never shake.
- Keep the can next to the piece you are working on. Carrying an open can of stain across a garage is how floors and finished ends get ruined.
- Work in order: panels first, then frames, then doors. Panels have one UV-coated side, and stray stain will not come off it, so do the panels before your workspace gets messy.
- Wipe stain on with a cotton rag. An old t-shirt works, but it must be cotton. Hit all the edges first, then the flat faces. Wiping gives a more even coat than brushing. Think of it like waxing a car: even pressure, steady rhythm, no stopping halfway.
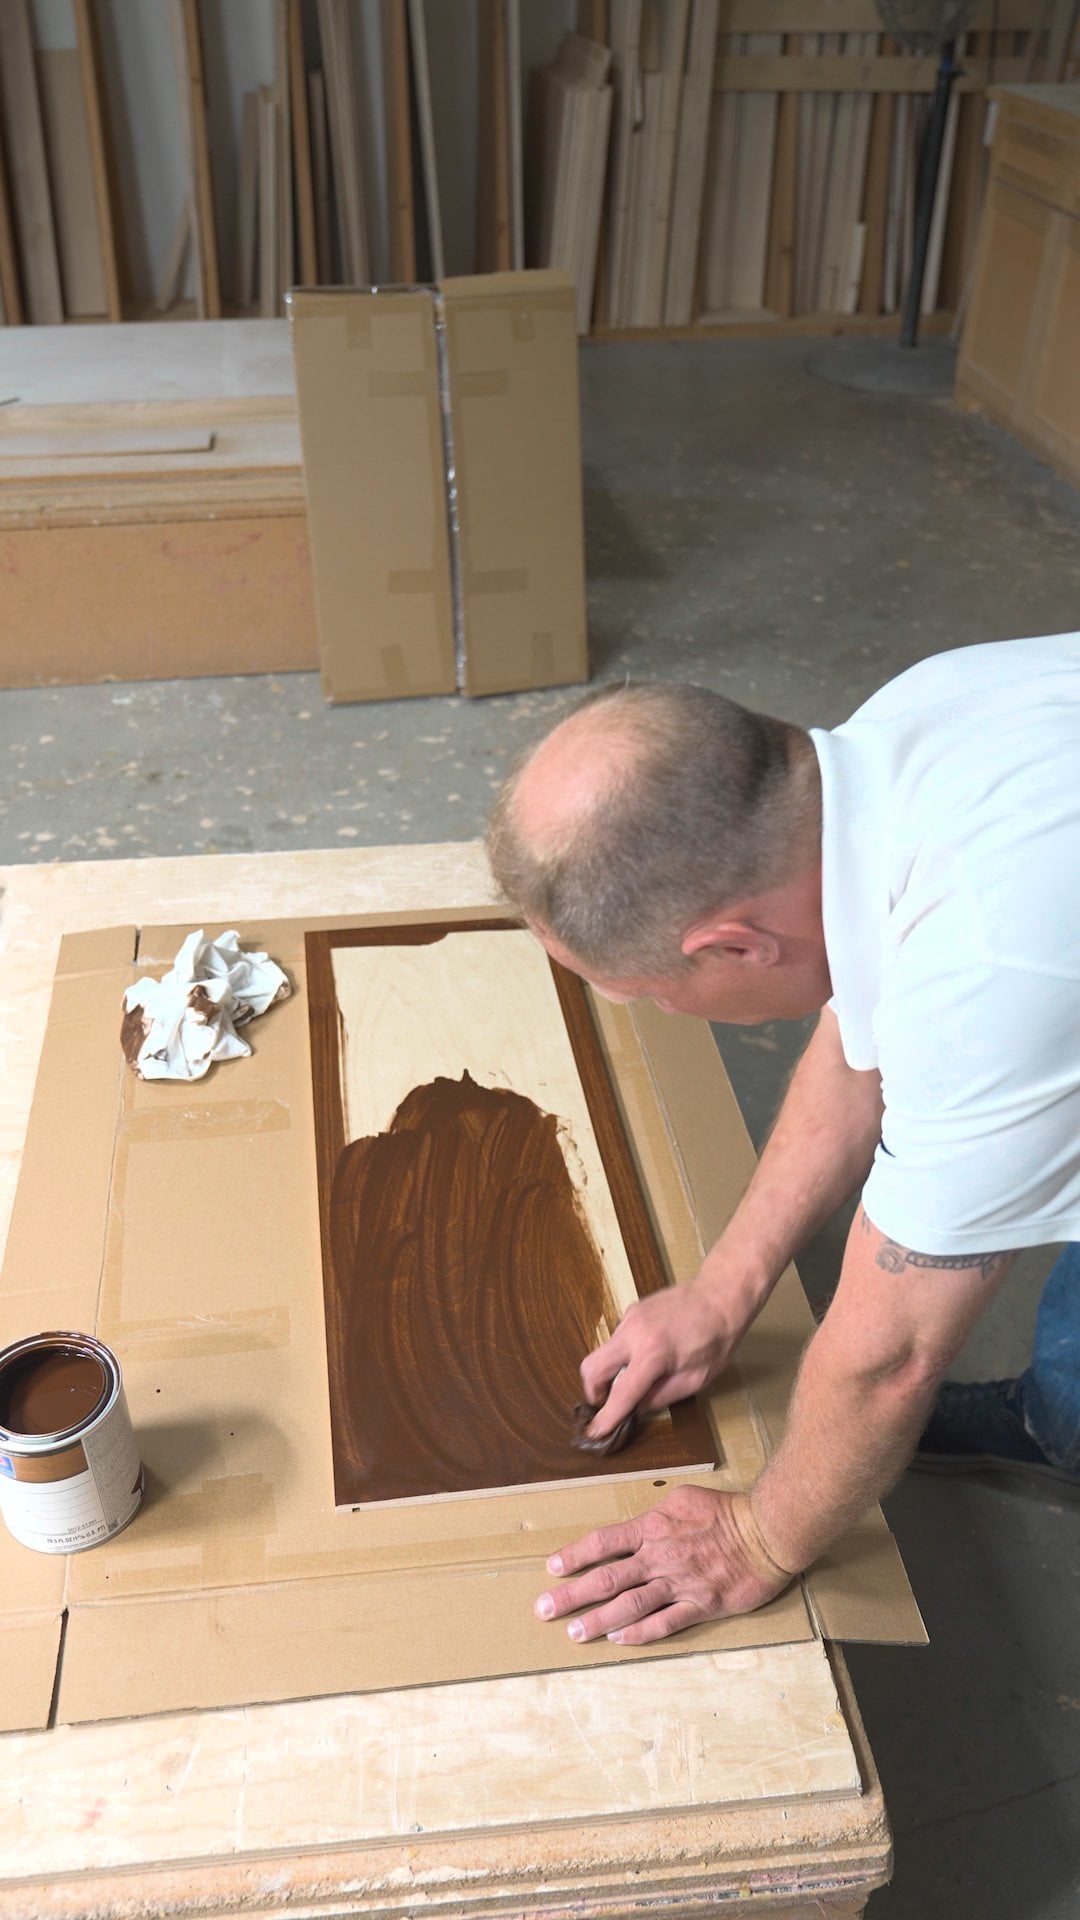
Even pressure, steady rhythm, like waxing a car. - Wipe off all excess within 15 to 20 seconds in hot or humid weather. Stain left sitting on the surface dries blotchy, dark in some areas and light in others.
- Fix dried spots by reactivating. Oil stain reactivates itself. Re-wet the spot with your stained rag, wipe it off immediately, and the spot disappears. This works on handprints too, so keep a spare rag over your free hand while you work.
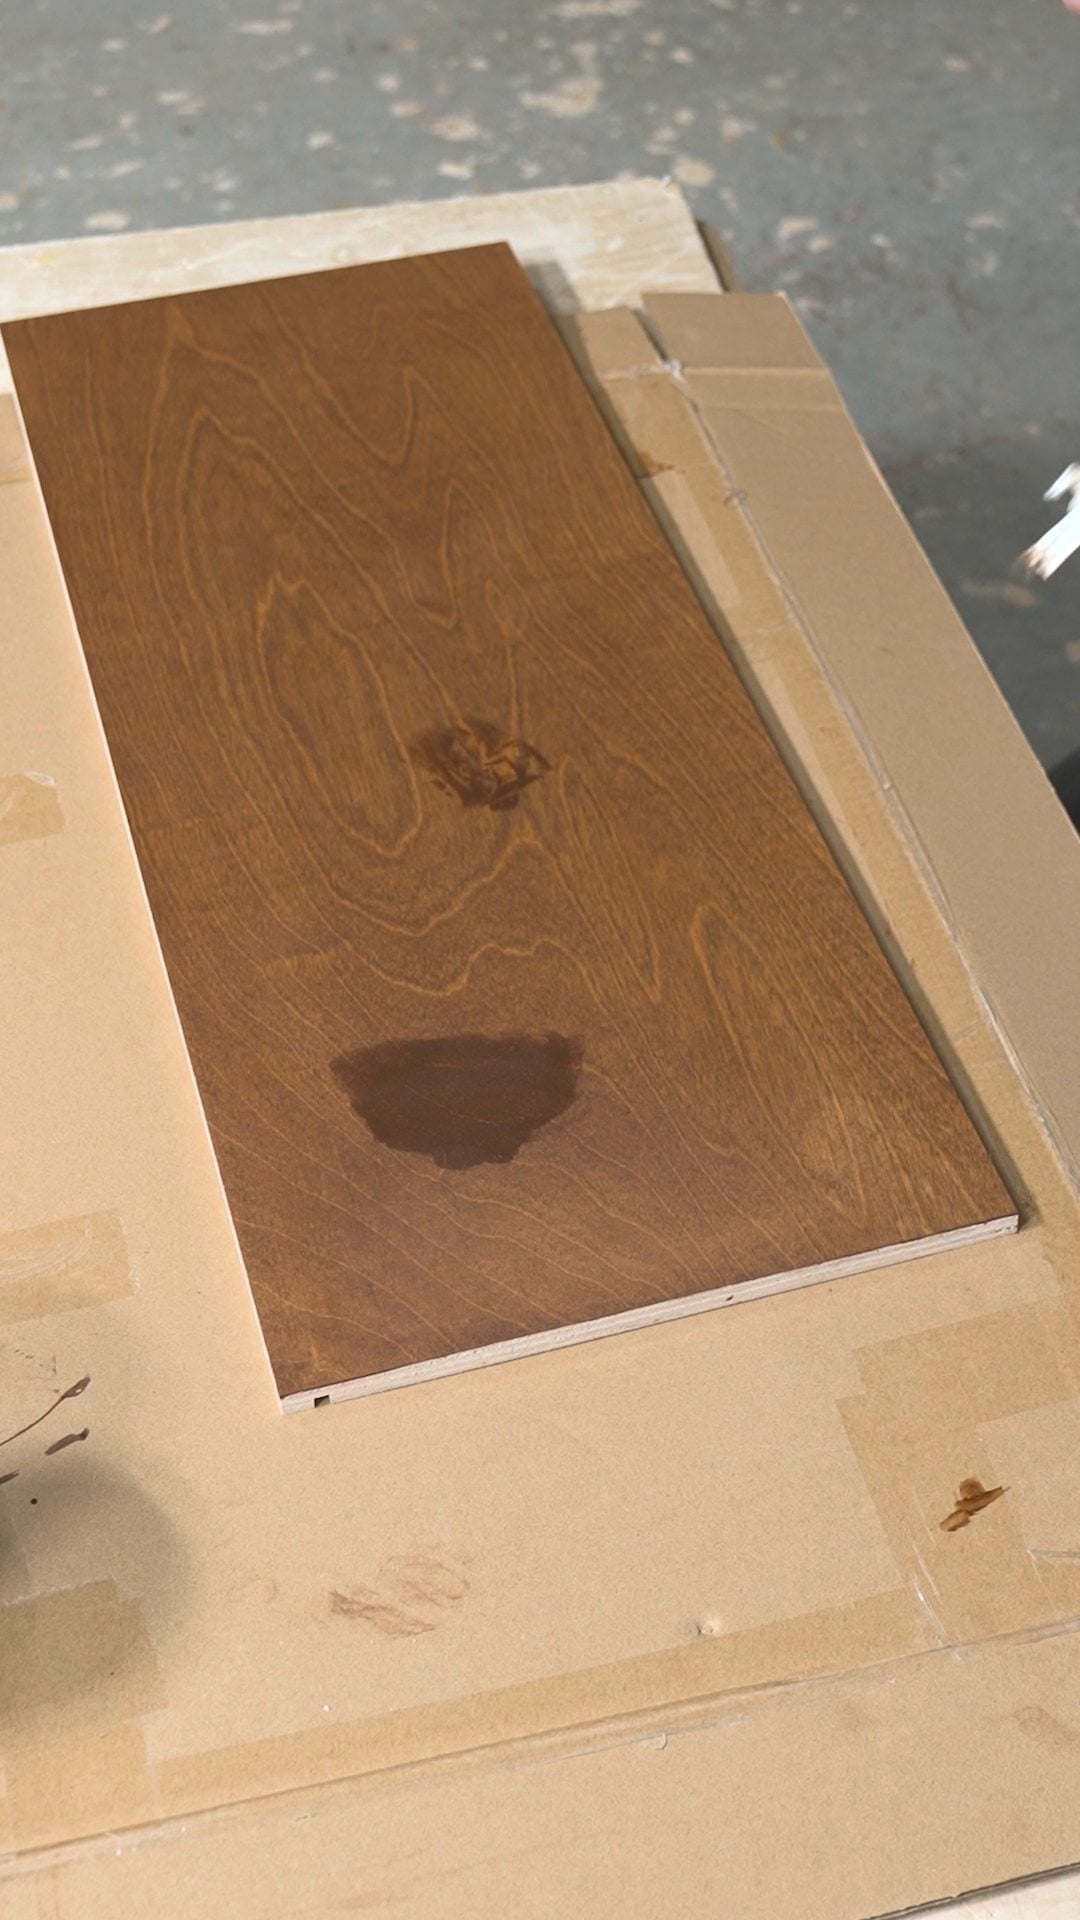
Before: stain that dried on the surface leaves dark blotches. 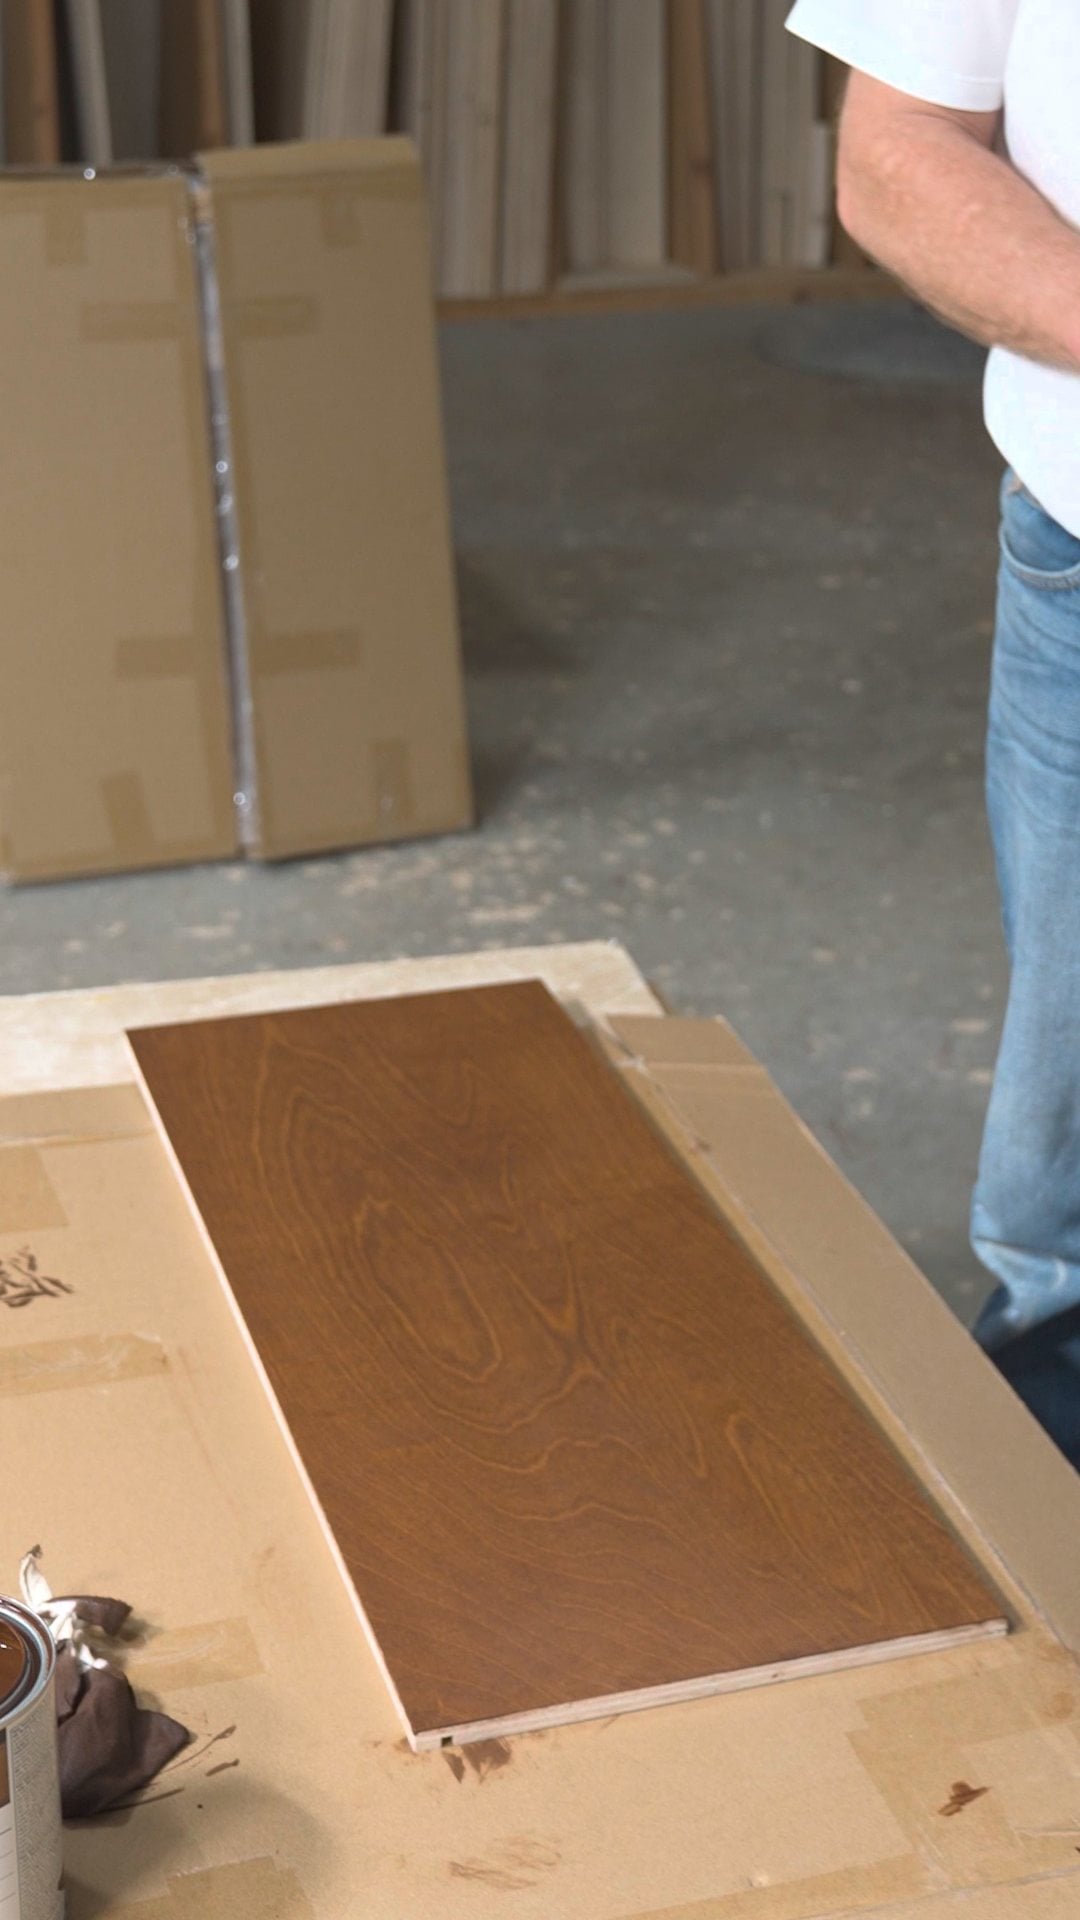
After: re-wet, wipe immediately, and the blotch lifts away. - Expect plywood panels to read slightly lighter than the solid birch doors and frames. If you want them to match exactly, stain a test piece of each before you start, and adjust how long you leave the stain on the lighter part.
- Spray the sanding sealer. Skipping sealer is the number one mistake in cabinet finishing: without it you will never get a smooth final finish. The sealer coat does not have to be perfectly even. It dries in 10 to 15 minutes on a hot day, about 30 minutes at 70°F.
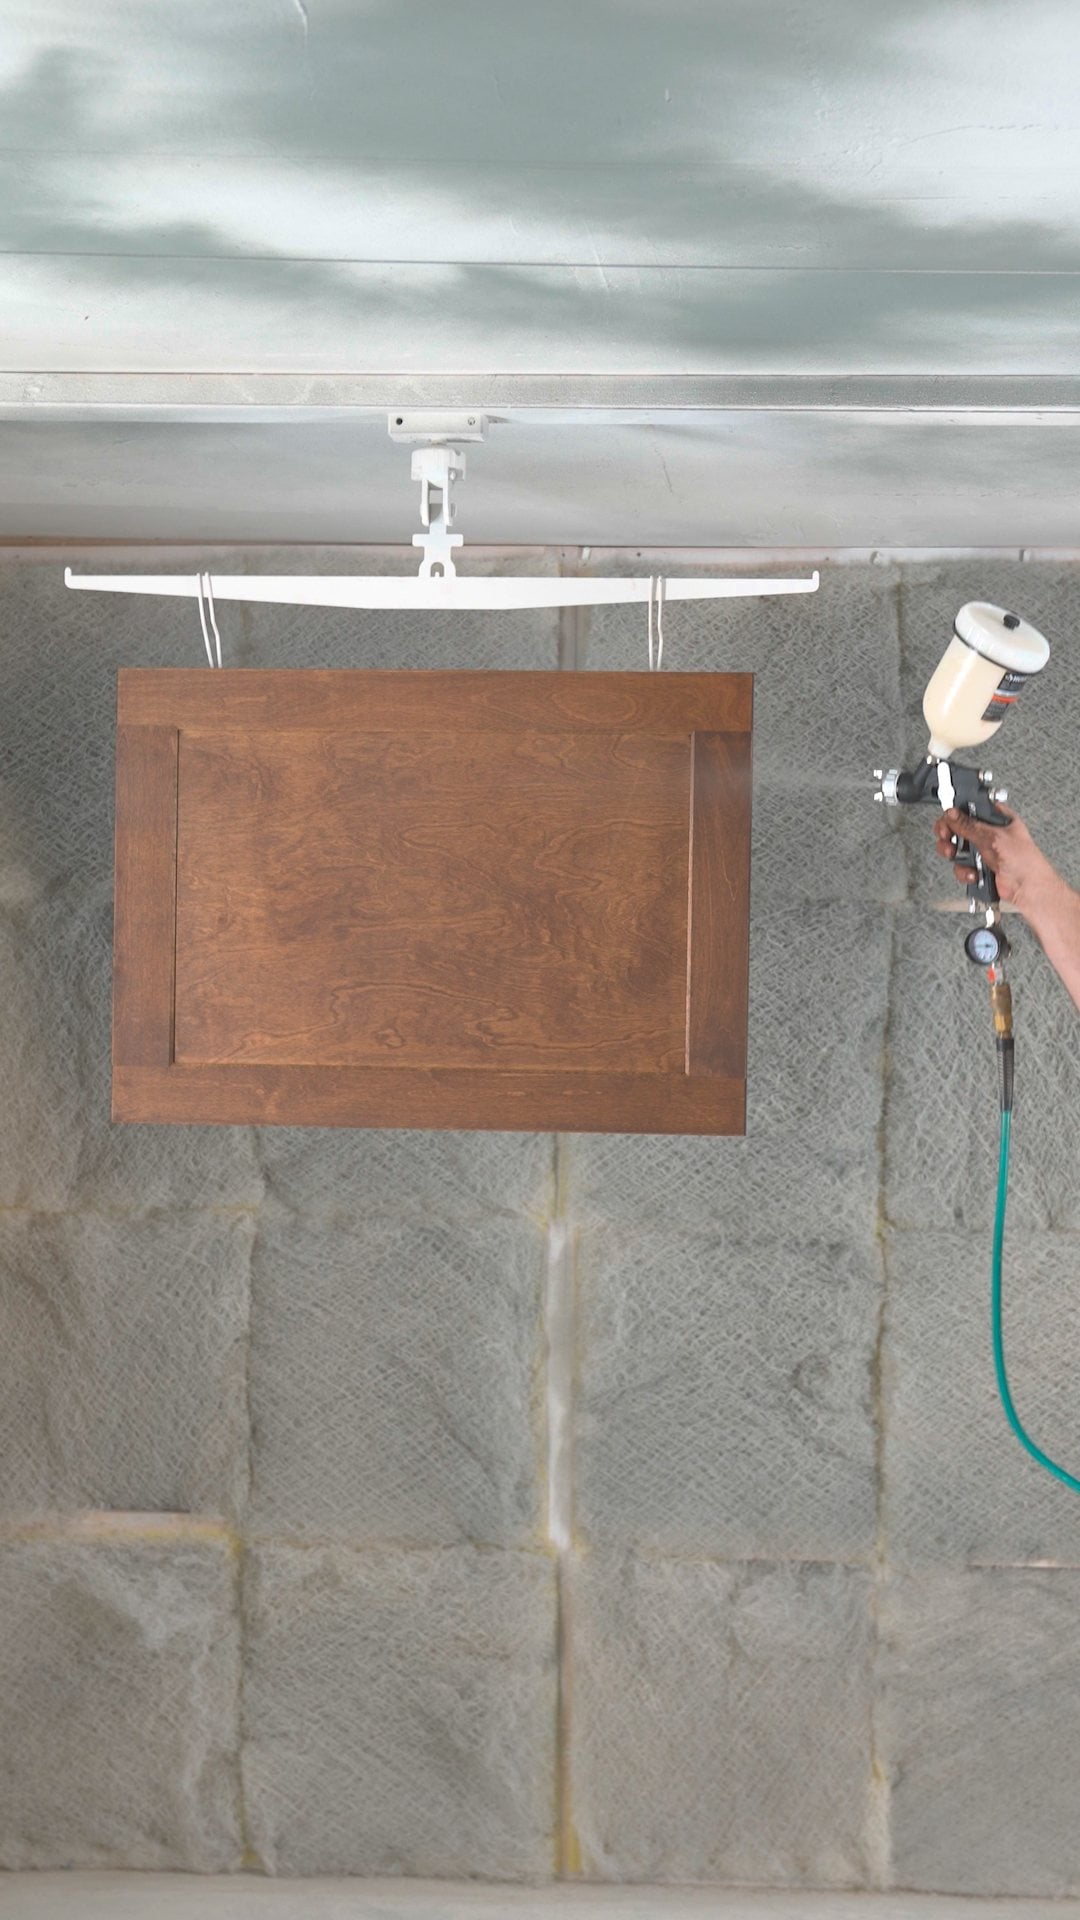
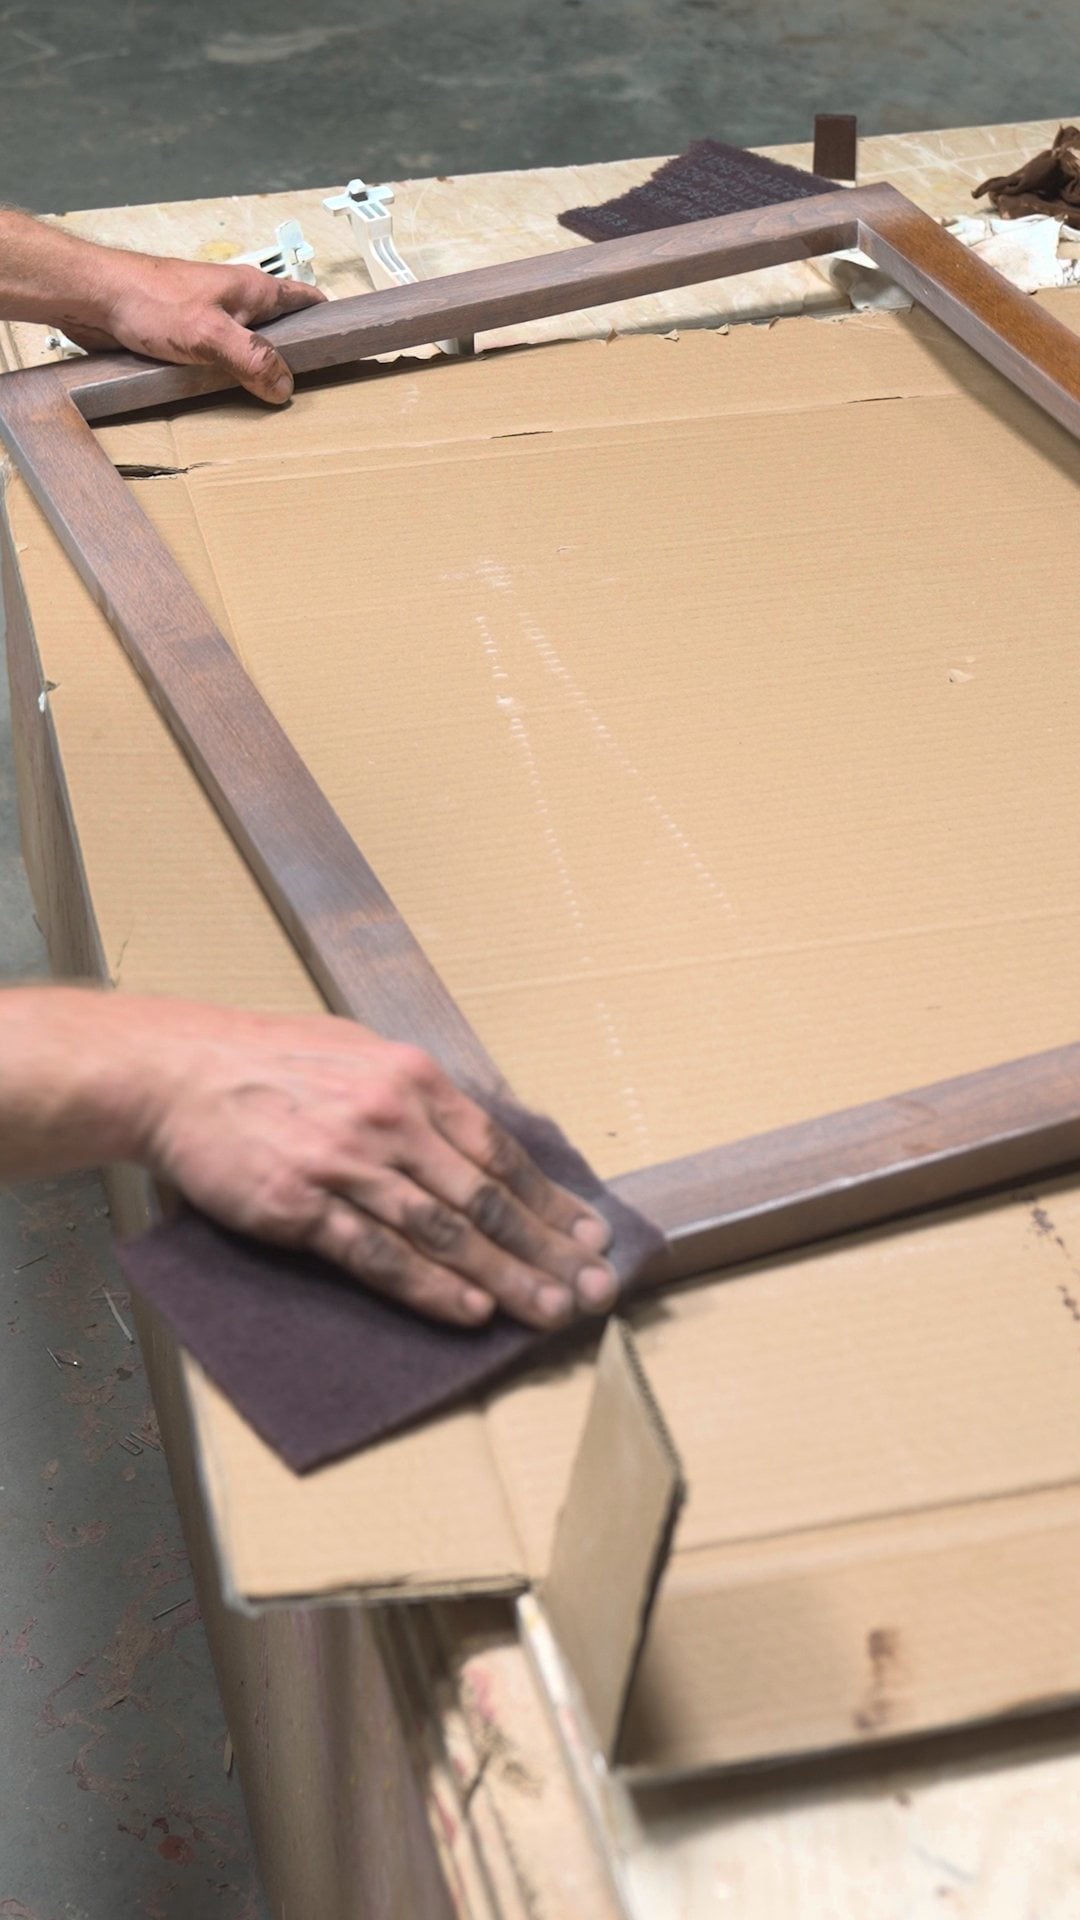
- Sand with steel wool. Unlike sandpaper, steel wool will not cut through the stain. Do the cross pieces first. The white powder residue it leaves behind melts into the next coat of lacquer.
- Spray 2 to 3 coats of lacquer topcoat. Thin it with a splash of lacquer thinner, and add lacquer retarder in hot or humid weather. Retarder slows drying and prevents the finish from turning hazy, a fog you cannot remove once it sets. At 85°F, the retarder goes straight into the mix, no debate.
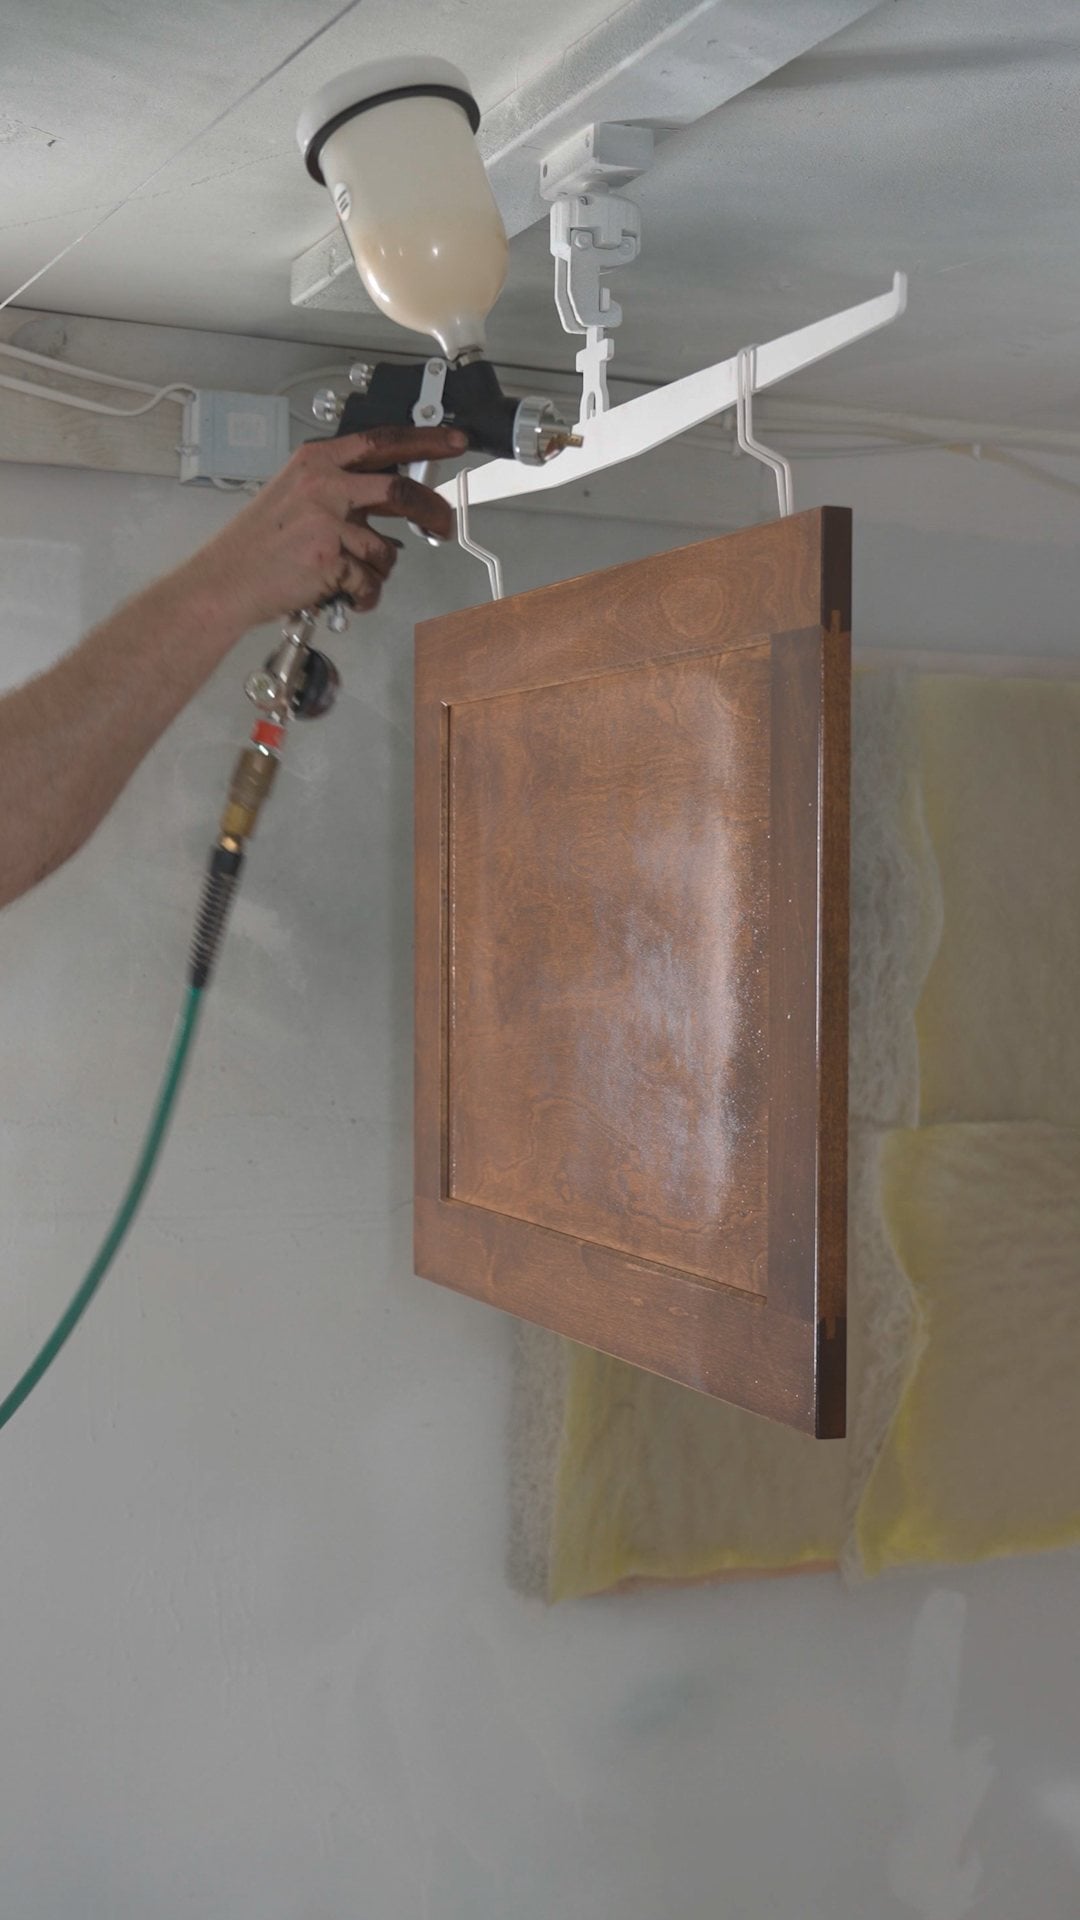
- Wait 2 to 5 minutes between coats. Watch the sheen at a low angle. When the sheen dies down, the surface is ready for the next pass.
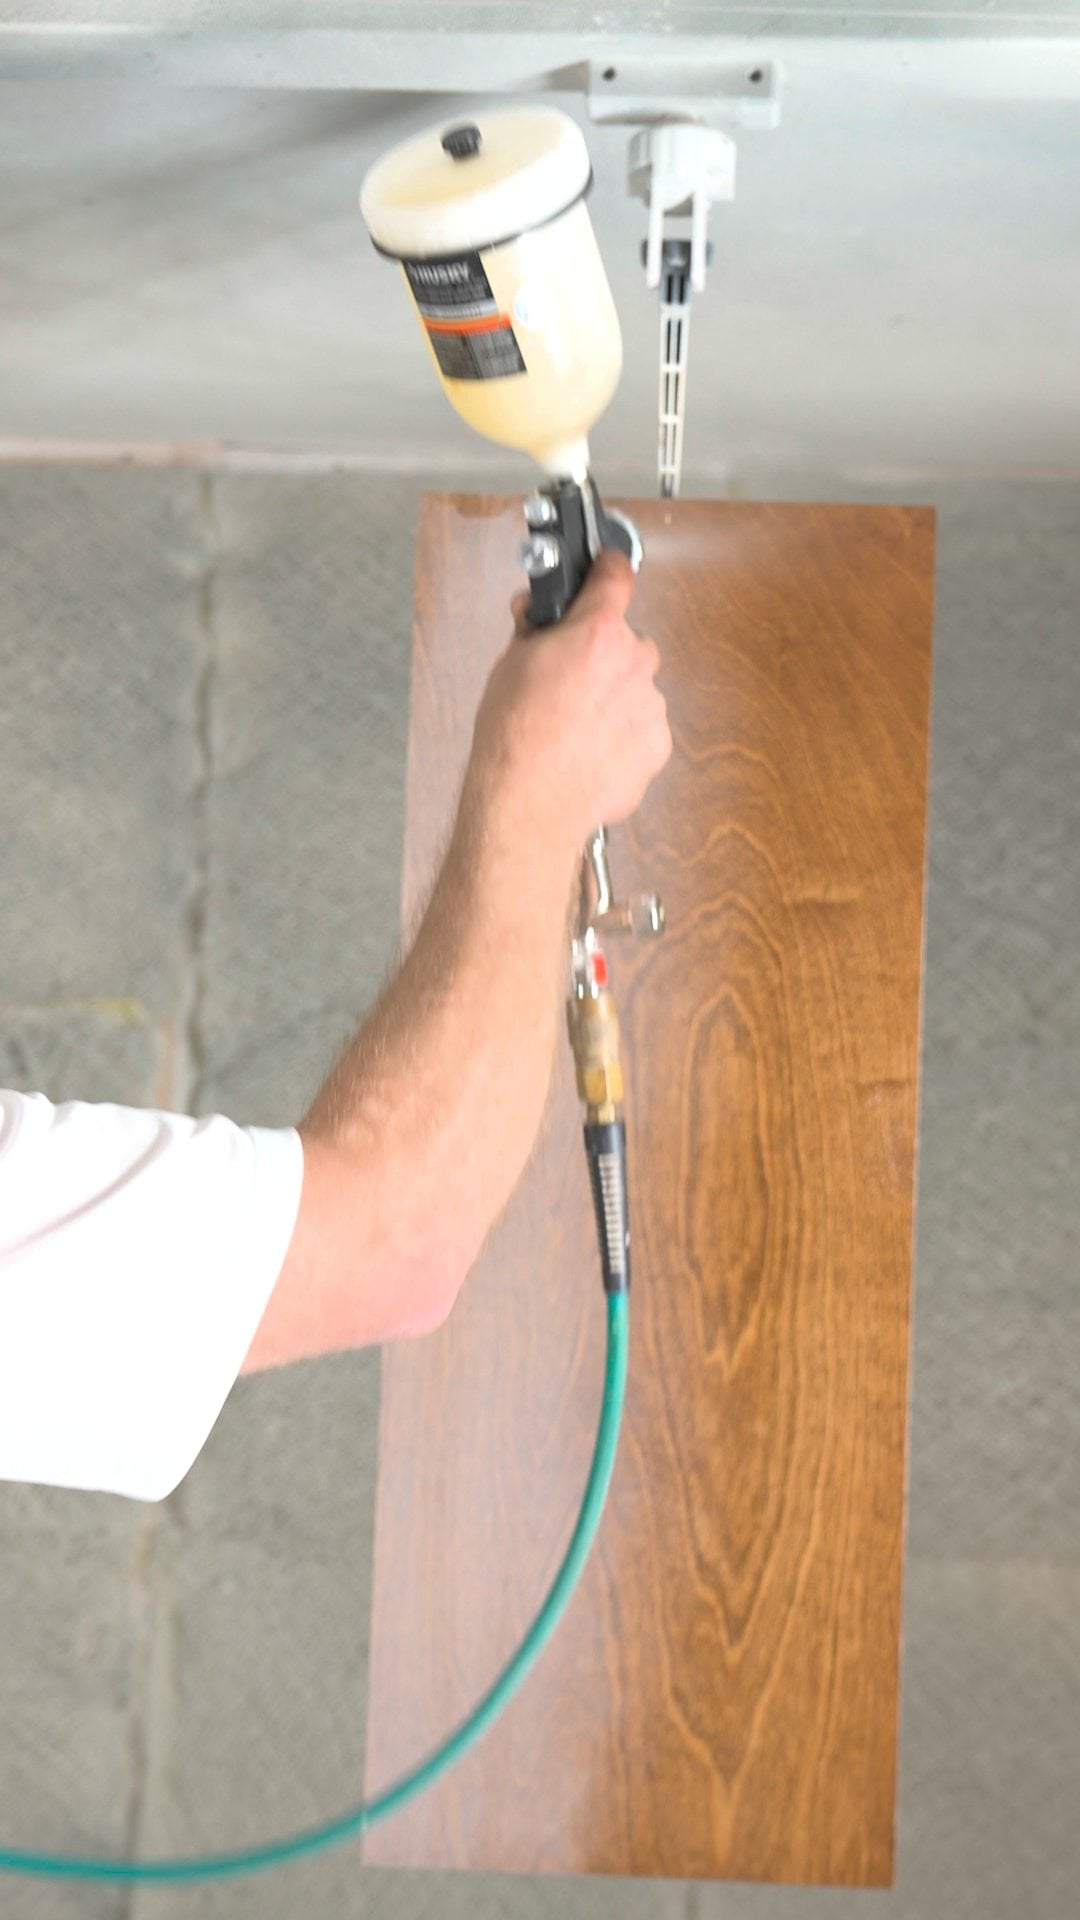
When the sheen dies down, the surface is ready for the next pass. - Wait 24 hours before assembly or installation. Lacquer is dry to the touch in minutes but stays soft underneath and scratches easily.
Safety, and this part is not optional: rags soaked with oil-based stain generate heat as they dry and can self-ignite. The NFPA counts roughly 1,700 home fires a year started by spontaneous combustion, around 900 of them from oily rags, according to Consumer Reports. When you finish, seal used rags in a metal can with water and keep it outside, away from the house.
Oil-Based or Water-Based Stain on Unfinished Cabinets?
Oil-based stain is what the process above is built around, and two documented traits explain why it suits cabinet doors: it gives you a longer working time on large pieces, and it does not raise the grain, so you are not sanding again before the clear coats. It also re-wets, which is what makes the fix in step 6 possible. The trade-offs are odor, slower cleanup, and rags that are a genuine fire hazard.
Water-based stain is lower in odor, dries fast enough to stain and finish in one day, cleans up with soap and water, and comes in a wider color range. The catch on a large flat panel is that drying fast means less time to wipe off before it sets, and it does raise the grain, so plan on a light sanding pass before the clear coats.
Gel stain is a third product people ask about, and it is built for a different job. It stays toward the surface instead of soaking in, which is also why it works on non-porous materials like fiberglass and metal. On raw birch you do not need it, and sitting on the surface is exactly what would hide the grain you bought the wood for.
How to Paint Unfinished Cabinets (Step by Step)
- Thin the paint. Cabinet enamel straight from the can is glue-thick and will not spray. Water-based enamel thins with plain water. Aim for a thin, steady stream running off the stir stick.
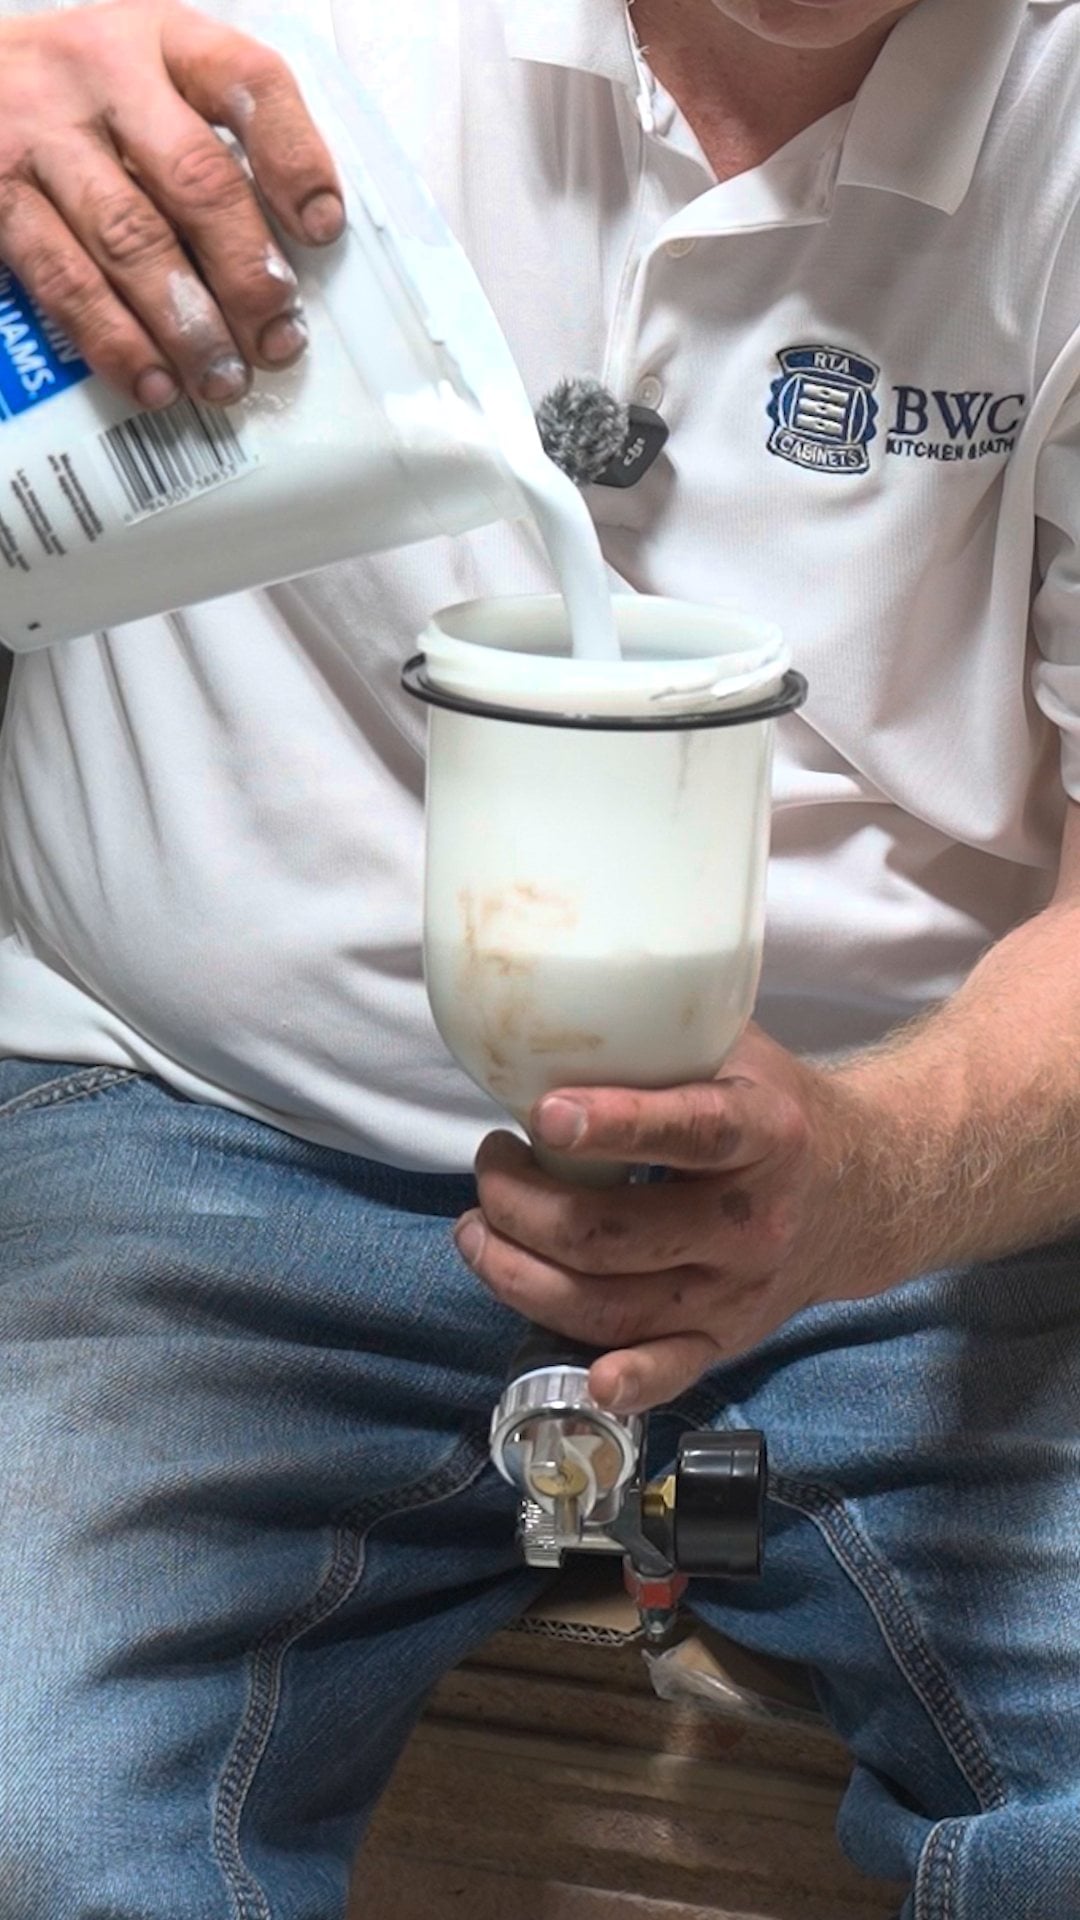
The target consistency: a thin, steady stream. - Strain the paint into the gun. A $0.95 strainer catches the small globs every factory can contain, the same globs that clog a spray tip mid-pass.
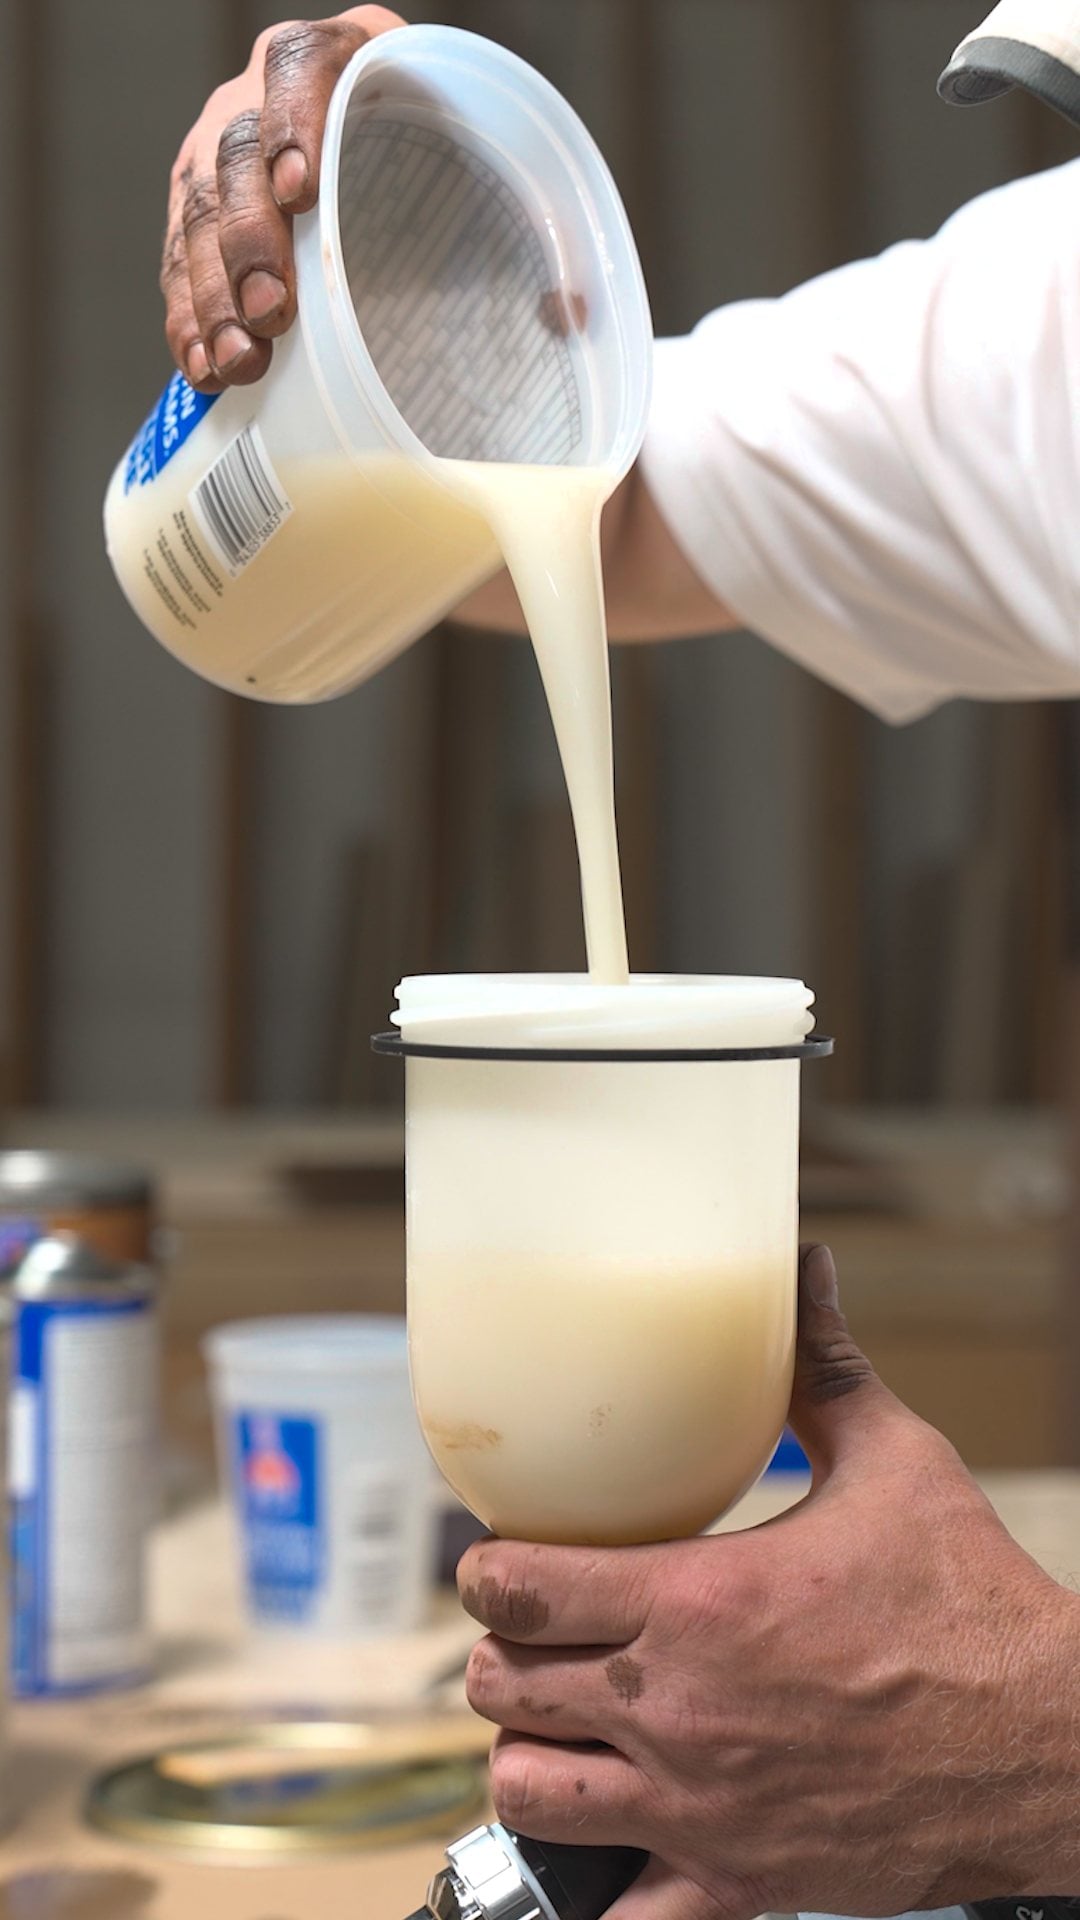
A $0.95 strainer catches the globs that clog a spray tip mid-pass. - Test the flow. Pour a little paint in the gun. A steady stream from the tip means a good spray pattern. A reluctant drip means thin it more.
- Spray 2 coats of a stain-blocking primer and let them dry for a couple of hours. A quality primer is the single biggest factor in a flawless painted finish. It seals raw wood the way sanding sealer does for stain, and a stain-blocking formula stops any wood extractives or resin from bleeding through a light color later.
- Sand lightly with a fine-grit sponge block. About six light passes per section, edges first. Do not burn through the primer.
- Remove every speck of dust. Blow it off with air, or use a tack cloth if you have no compressor. With water-based paint, anything floating in the air lands in your finish. In a garage, tape plastic sheeting from ceiling to floor to make a simple spray booth.
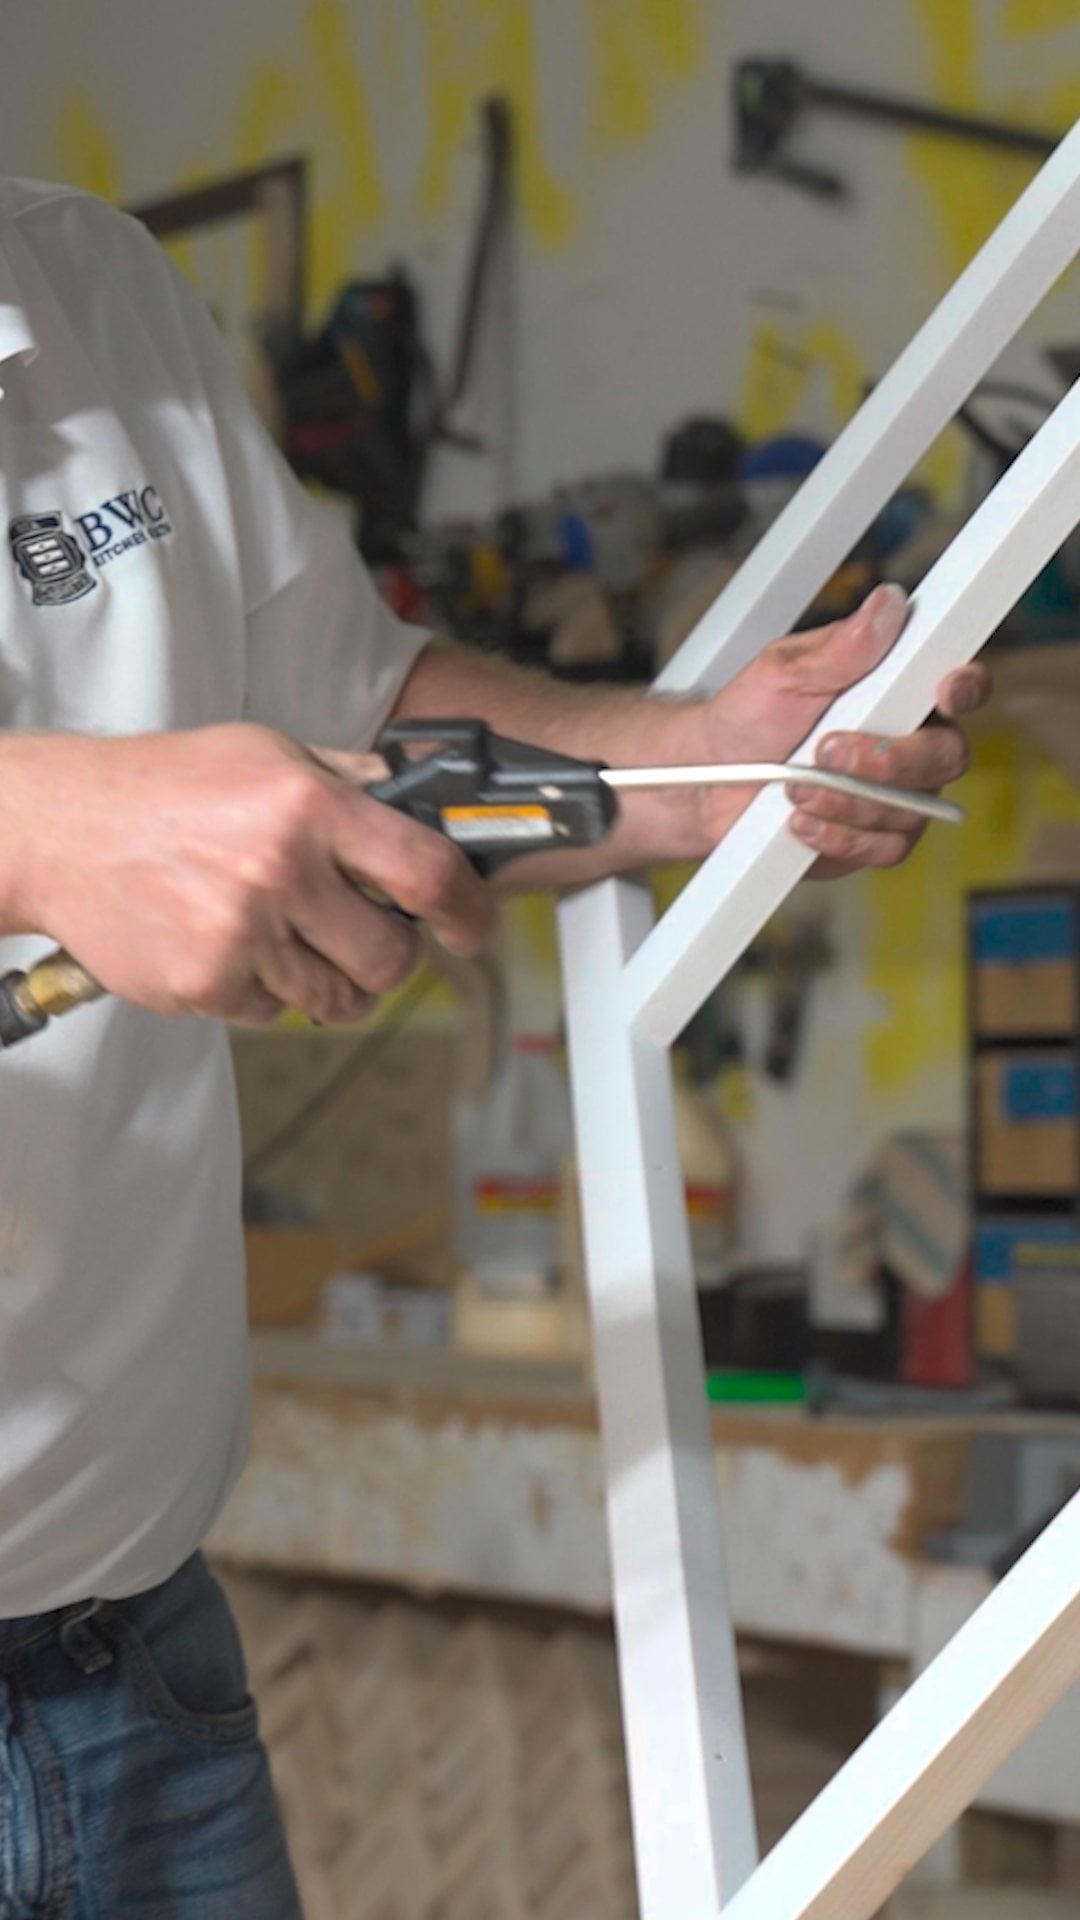
- Spray 2 top coats, waiting a full 15 minutes between them. That wait is the most critical part of the whole paint job. Recoat too soon and the finish never levels properly.
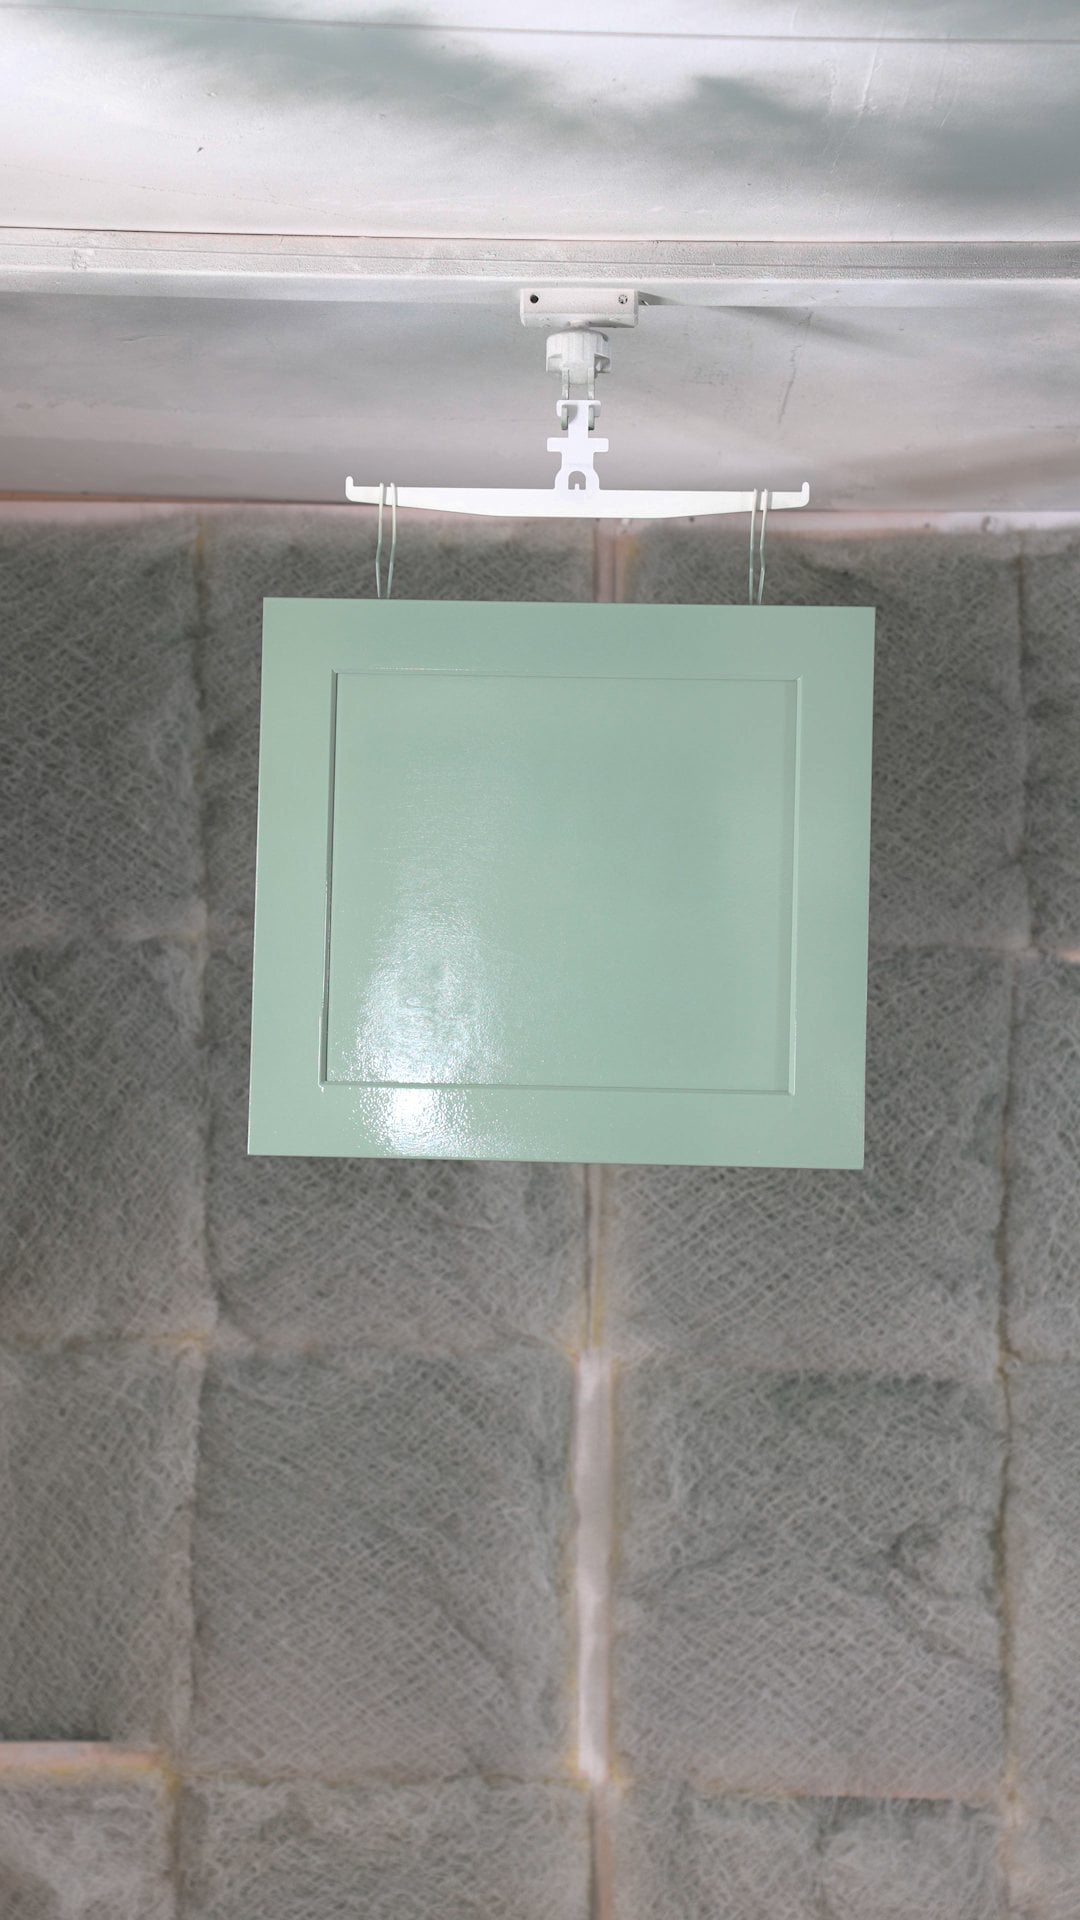
A properly timed coat levels to a factory-smooth film. - Do both faces of every door, and the show side of every box. Doors get sprayed back first, then flipped and done on the face. Box interiors are already coated and do not get painted.
- Optional detail step: fill seams and small imperfections with spot glazing putty before the top coat. It dries in about an hour and sands flat. Remember that dark colors show every flaw and white is the most forgiving, and that a slightly heavier coat hides small imperfections better than a thin one.
What Sheen Should You Use on Cabinets?
Cabinets and wood trim traditionally sit at the gloss and high-gloss end of the sheen range, semi-gloss is the standard kitchen, bathroom and trim pick for its cleanability, and satin or eggshell covers the washable, scuff-tolerant middle, while flat is the sheen most prone to scuffs and stains. Cabinet enamels are typically sold in exactly those three: gloss, satin and semi-gloss.
For a first spray job, work down that list rather than up. The shinier the sheen, the more it reveals a wave in a top coat, a dust nib, or a spot you sanded a little too hard. Satin hides all three and still wipes clean, semi-gloss is the crisper and easier-to-clean choice once your prep is solid, and gloss earns its place only when you want a lacquered look on a genuinely flawless surface. Flat and matte belong nowhere near a door that gets grabbed with wet hands.
Do Painted Cabinets Need a Clear Coat?
Not with a cabinet-grade enamel. A urethane-modified enamel cures into a hard, durable finish built for frequently cleaned and heavily used areas, and it resists yellowing in a way traditional oil-based paints do not. It is the finish, not a base for one.
If you still want a clear coat on a heavily used door, two rules. Give the enamel its full cure time first, and choose a water-based clear that is specifically labelled non-yellowing and non-ambering, rather than an oil-based product over a light color. The simpler option is a third thin coat of the same enamel.
Stained cabinets are the opposite case: stain is not a finish at all, so the sanding sealer and the lacquer coats are what protect the wood. Do not skip them.
Spray-Gun Technique: A Factory Finish From a $100 Cup Gun
- Dial in on cardboard first, never on your cabinets. Start around 60 PSI and adjust down toward 35 to 40 while testing. Aim for a fan pattern about 6 inches wide, at about half trigger.
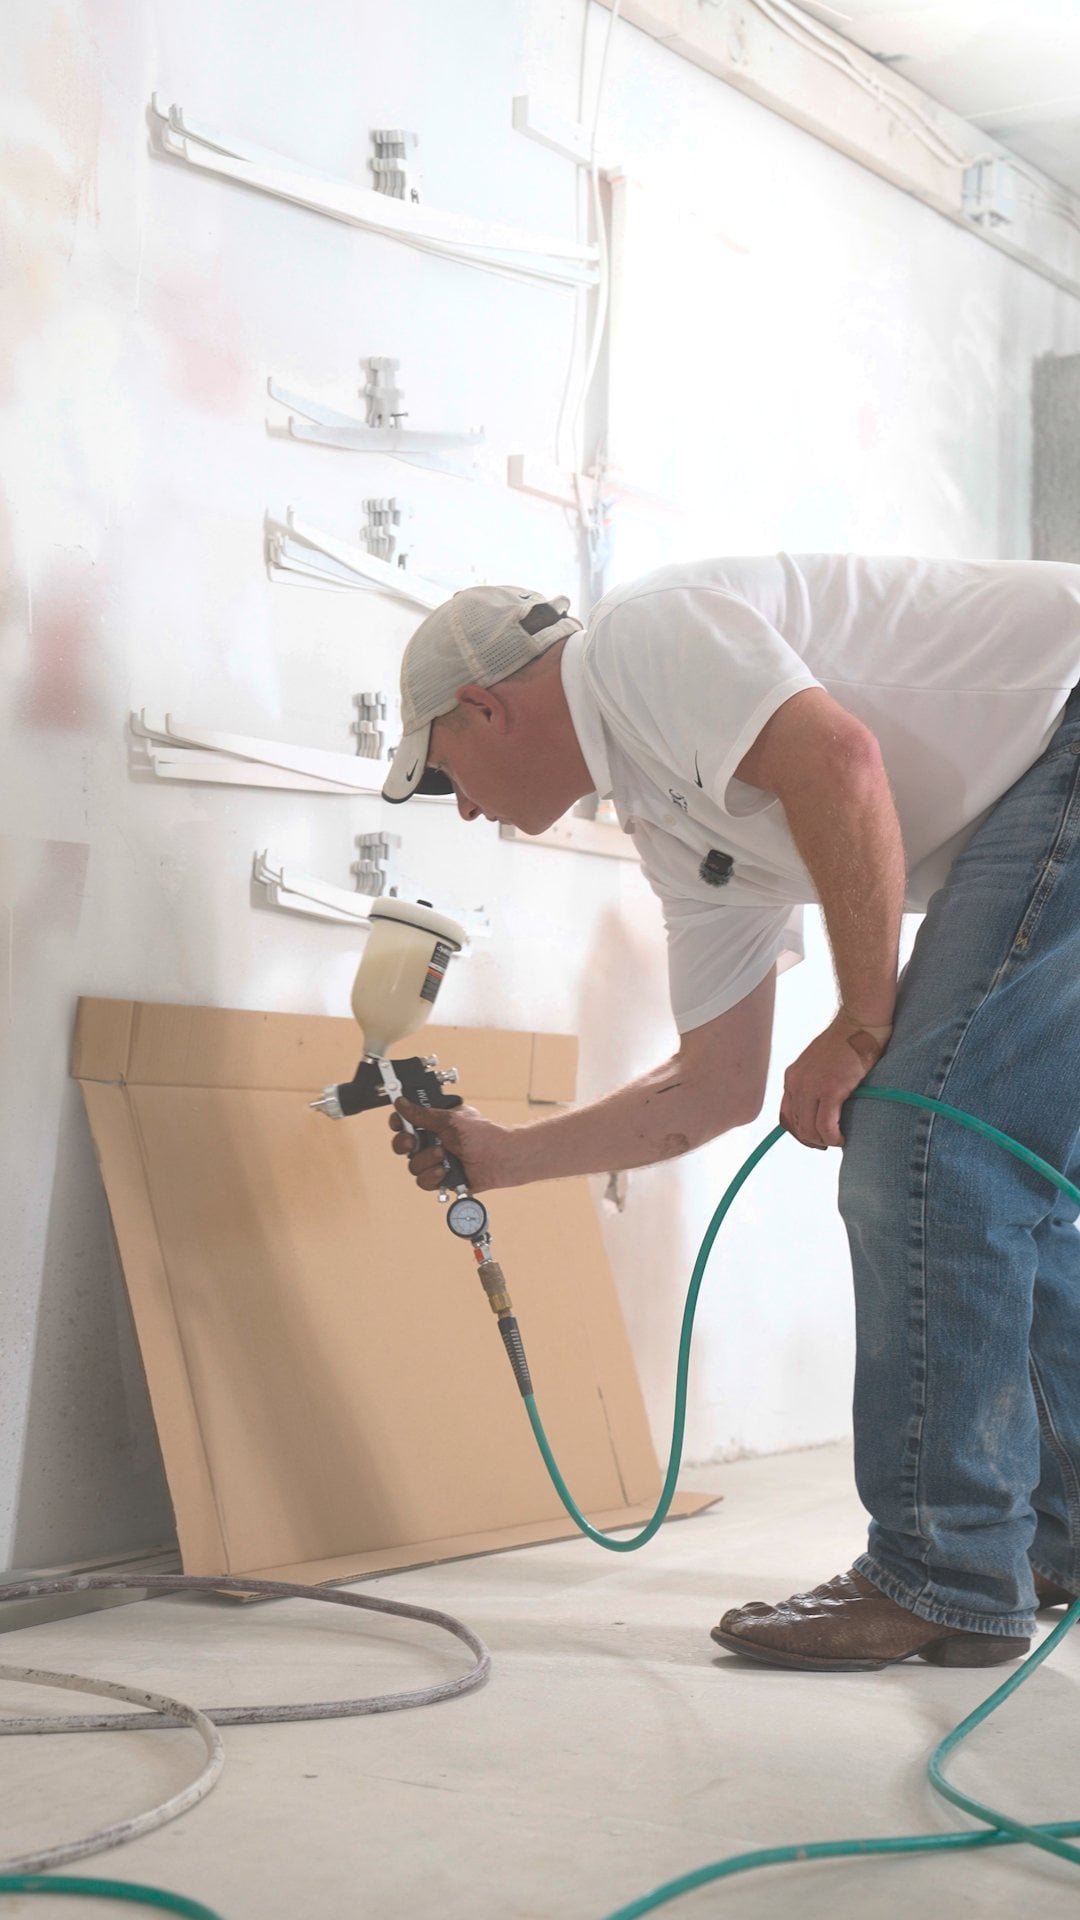
The target: a fan about 6 inches wide, at about half trigger. - Keep a wet line. Each pass should overlap the previous one while it is still wet. That overlap is what produces a glassy, consistent surface.
- Never stop and go mid-panel. Spray in continuous passes, start high and work down. Stop-and-go spraying is what leaves stripes and high spots.
- Rotate the nozzle to switch the fan between vertical for edges and sides, and horizontal for faces.
- Doors: back side first. Top and bottom edges, then the sides, then the panel, rails before stiles. Let it flash off, recoat, then flip and repeat on the face.
- Do the cross pieces first. Rails before stiles, and overlap the sections, so you never end up with a high spot and a low spot where they meet.
- No spray booth? Use the nail-strip trick. Shoot 18-gauge nails through 1-inch wood strips so the points stick up like a bed of nails, then lay the door on the points. You can spray one side, flip it immediately, and spray the other with no waiting and no smudges.
- The leftover sealer in the cup goes back in the can. It will not hurt the can, and it keeps the gun clean.
Do You Paint the Inside of Unfinished Cabinets?
No, and on this line you do not need to. The interior faces arrive with a natural UV coating that is moisture-resistant and wipe-clean, which is why wet dishes out of the dishwasher leave no marks on them.
What you do finish is the face frame, both faces of every door, and the drawer fronts. An exposed show side of the box gets an unfinished skin panel first, or a scuff-sand of its UV coating (see the sanding section above), because the included side panels arrive UV coated. What you leave alone is the coated interior, and any cabinet-to-cabinet side that will be hidden once the run is installed.
If you specifically want a painted interior for a glass-door cabinet, understand what you are taking on: painting over a factory UV coating means scuff-sanding it first and priming with a bonding primer, which is the one part of this project that is more work than it looks. It is worth it for one glass-front cabinet, not for a whole kitchen.
Finishing Unfinished Bathroom Vanity Cabinets
The method is identical for unfinished vanity cabinets, with one adjustment and one advantage.
The adjustment: a bathroom sees steam every day, so this is not the place to shorten the sealer or primer step, or to rush the 24-hour cure.
The advantage: a vanity is one or two doors and a drawer front, which makes it the cheapest possible place to learn the wipe-and-wipe-off rhythm before you commit to a kitchen full of doors.
How Long Does It Take to Paint or Stain Unfinished Cabinets?
Plan for a weekend of actual work plus drying time. Staining moves faster per piece: seconds to wipe on and off, 10 to 15 minutes for sealer to dry, 2 to 5 minutes between lacquer coats, but it demands full attention while you work. Painting has longer waits, a couple of hours after primer and 15 minutes between top coats, but each session is relaxed.
Because the cabinets arrive flat, both faces of a door can be sprayed in a single session using the nail-strip trick, which is where most of the time saving comes from. Either way, give everything a full 24 hours to cure before you assemble, hang doors, or install drawers, because lacquer and enamel both stay soft under the surface long after they feel dry.
How Much Does It Cost to Paint or Stain Unfinished Cabinets?
The DIY route costs under $250 in tools and supplies, including the $99 spray gun you keep for the next project. Hiring a professional to paint existing cabinets costs $425 to $1,466 for most projects, with a national average around $941 and large kitchens running up to about $3,200, according to Angi’s 2026 cost data.
On the cabinets themselves, the saving is not that raw wood is the cheapest box in the catalog. It is that you skip the custom-color markup entirely and you skip the wait: special-order colors at big-box stores can run up to 12 weeks, and these ship in 7–10 business days.
Two practical notes before you order. There is a $2,000 minimum order, so this route makes sense for a whole kitchen or a full set of uppers rather than one cabinet. And if you only want to test a color first, an unfinished shaker sample door is the low-risk way to do it. Price out your layout with unfinished shaker base cabinets and wall cabinets.
FAQ
Do unfinished cabinets need to be sanded before painting or staining?
Not on the doors, which arrive completely unfinished with no coating to remove. Standard preparation for bare wood runs 100 to 150 grit for real blemishes and then 180 to 220 grit to even out the surface, but the doors arrive ready to paint or stain, so in practice you give one light pass with a fine-grit sponge block wherever you feel a raised patch or a nick. The included side panels are the exception: they arrive UV coated, so any exposed side needs an unfinished skin panel (each cabinet category lists the matching SKU) or a scuff-sand first. You do sand between coats: a sponge block after primer, or steel wool after sanding sealer.
What is the best paint and primer for unfinished cabinets?
A cabinet-grade urethane-modified enamel over a stain-blocking latex primer. The enamel levels flat, cures hard and resists yellowing. The primer seals raw birch and stops any wood extractives from bleeding through a light color, and it matters more to the final result than the paint does.
Is it better to spray, brush, or roll paint on cabinets?
Spraying gives the smoothest, most factory-like finish, especially in a five-piece door profile, and a $99 cup gun is enough for one kitchen. Brushing and rolling are workable with a self-leveling cabinet enamel: use a microfiber roller on flats, a synthetic brush in the profile, thin the paint slightly, and accept a couple of extra coats.
Do you paint the inside of unfinished cabinets?
No. The interior faces arrive with a natural UV coating that is moisture-resistant and wipe-clean, so you finish the show side of the box, the face frame, both faces of the doors, and the drawer fronts. Painting a coated interior means scuff-sanding and a bonding primer first, which is rarely worth it outside a glass-front cabinet.
Should you finish unfinished cabinets before or after assembly?
Before. These ship flat, so you finish the frame, doors, drawer fronts and any unfinished skin panels separately, which avoids masking hardware and spraying into corners. Wait at least 24 hours after the last coat before you assemble, because lacquer and enamel stay soft under the surface.
Is it better to paint or stain kitchen cabinets?
Neither is universally better. Stain highlights natural wood grain, hides small marks and everyday scuffs well, and works fast, but it dries quickly and demands speed. Paint offers unlimited color and a relaxed pace, but it shows flaws more and chips at door edges read as a different color underneath. First-timers usually find paint more forgiving.
Can you paint kitchen cabinets without sanding?
On previously finished cabinets, no. The old finish needs scuff-sanding for adhesion. On unfinished cabinets the doors need no prep sanding to speak of: prime, then sand lightly between coats with a fine-grit sponge block. Only a UV-coated side panel that stays exposed needs a scuff-sand, or, easier, an unfinished skin panel over it. That is the main reason DIYers start with unfinished.
Do painted cabinets need a clear coat?
Not with a cabinet-grade enamel, which is the finish itself: creating a hard, durable finish that resists yellowing compared with traditional oil-based paints. If you want a clear coat anyway, let the enamel cure fully and choose a water-based clear labelled non-yellowing and non-ambering rather than an oil-based product over a light color. A third thin coat of the same enamel is simpler.
Do you need gel stain on unfinished cabinets?
No. Gel stain stays toward the surface instead of soaking in, which is also why it works on non-porous materials like fiberglass and metal. Raw birch takes a penetrating oil stain properly, and a surface film would hide the grain you bought the wood for.
What happens if the stain dries before I wipe it off?
It leaves a dark blotch, but oil-based stain reactivates. Re-wet the dried spot with a stain-dampened rag and wipe immediately. The blotch lifts away. The same trick removes accidental handprints.
How many coats do unfinished cabinets need?
For stain: one wiped-on stain application, one coat of sanding sealer, then 2 to 3 coats of lacquer. For paint: 2 coats of primer and 2 top coats, sanding lightly between coats. In both cases wait 24 hours before assembly.
How much does it cost to paint kitchen cabinets?
DIY on unfinished cabinets: under $250 in tools and supplies. Hiring a pro to paint existing cabinets: $425 to $1,466 for most projects, around $941 on average, and up to about $3,200 for large kitchens, per Angi’s 2026 data. Labor makes up most of the professional price.
The Bottom Line
Learning how to paint unfinished cabinets, or stain them, comes down to three things: raw doors mean there is no old finish to strip, the drying windows are non-negotiable (15 to 20 seconds for stain wipe-off, 15 minutes between paint coats, 24 hours before assembly), and a $100 cup gun does the work a $1,000 rig would. Whether you stain birch until it looks like mahogany or paint a two-tone kitchen, the custom look costs a fraction of custom prices.
Ready to start? Browse the unfinished shaker collection, order a sample door, pick your color, and finish them your way. Delivery in 7–10 business days.