
 Sales:
  Customer Service:
 How to Clean and Maintain Kitchen Cabinets for a Spotless Kitchen
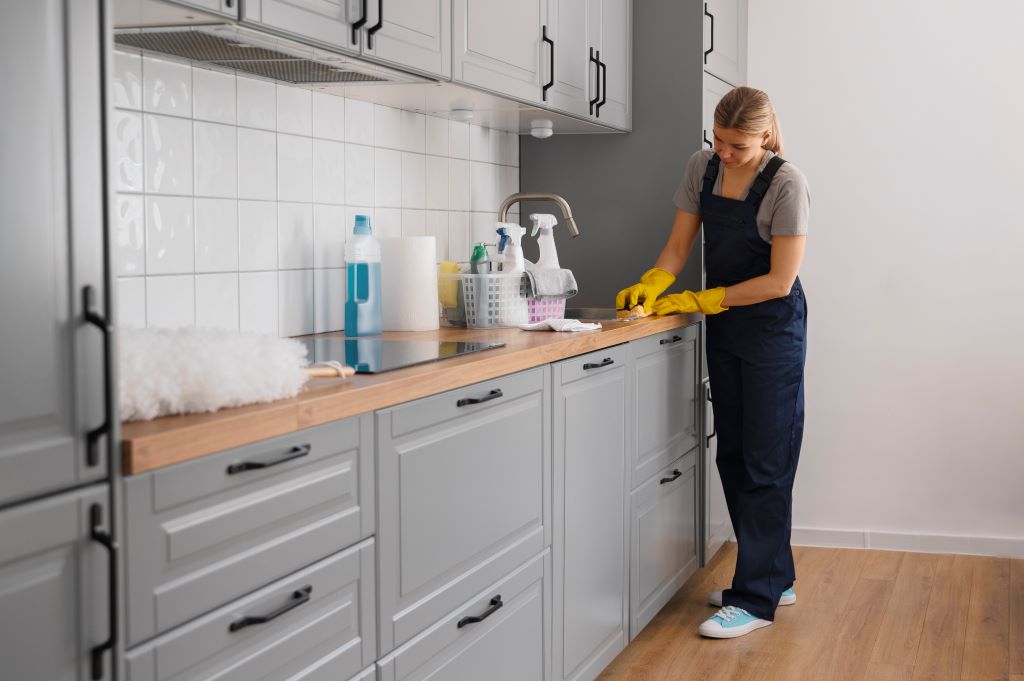
Table of Contents
Let’s be real: kitchen cabinets are some of the most abused things in a house. They store your favorite snacks, your dishes, maybe that random spice you only use once a year, and yet somehow, they look like a sticky mess most of the time. If you have ever wondered how to clean kitchen cabinets properly and keep them looking decent, this is going to help.
This blog will break down the process step by step, share some mistakes and little hacks, and teach you all the things you would have otherwise learned after spending way too many hours elbow-deep in soap and warm water.
Understanding Your Kitchen Cabinets
Before you dive in with a sponge to clean, you need to know what you are working with. It’s a common mistake to treat all cabinets the same, and let’s just say it doesn’t end well. Some cabinets are forgiving, but if you clean them incorrectly, they will peel, warp, or stain.
Types of Kitchen Cabinets
Here’s a simple breakdown you can take a look at before starting.
| Cabinet Type | Material Details | Cleaning Tips & Warnings |
|---|---|---|
| Wood Cabinets | Solid wood like oak, maple, cherry | Damp microfiber cloth + mild dish soap. Don’t soak. Avoid scrubbing too hard. |
| Laminate Cabinets | Particleboard or MDF with laminate | Soft sponge, warm water. Harsh chemicals will peel the surface. |
| Thermofoil Cabinets | MDF with vinyl coating | Only a damp cloth. Heat and scrubbing can ruin it. |
| Metal Cabinets | Stainless steel or aluminum | Microfiber cloth and mild soap. Wipe dry immediately. Avoid abrasive pads. |
| Glass Cabinets | Glass inserts or doors | Microfiber cloth or glass cleaner. Dry completely to prevent streaks. |
Here’s a pro tip: If your cabinets are made of mixed materials, clean them separately, and don’t assume one method fits all. Some learn this the hard way when they ruin a laminate corner, thinking it was wood.
Why Cleaning Kitchen Cabinets Matters
You might be thinking, “Do we really need to clean my cabinets? The counters get wiped; isn’t that enough?” Not really. Cleaning kitchen cabinets is required because cabinets get dust, fingerprints, and tiny spills that you barely notice until you start scrubbing.
Grease builds up, dust settles, and sometimes it becomes sticky. Over time, this can damage the finish, warp wood, peel laminate, or even make your kitchen smell weird.
Cleaning isn’t just about looks. It’s about keeping surfaces safe and hygienic and preventing tiny messes from turning into bigger problems. Plus, it just feels good to open a cabinet and not cringe.
Essential Cleaning Supplies for Kitchen Cabinets
You really don’t need fancy equipment to clean kitchen cabinets. There is no need to buy all these “specialty cleaners,” and honestly, warm water, dish soap, and a few simple tools work just as well.
Microfiber Cloths
Honestly, microfiber cloths are the favorite cleaning hack for cabinets. You can try paper towels or rags, but they just push dust around. Be sure to keep a few folded nearby and start with dry ones to grab dust first, then dampen one for sticky spots. They don’t leave those annoying little fibers behind, which is a lifesaver on glossy or glass doors.
Sometimes, if you forget to wash them, and yeah, they get a bit funky, but they still are better than anything else. If you have tried everything for cleaning except this, try it. You will find a huge difference.
Mild Dish Soap
Mild dish soap is the go-to for cleaning. It’s cheap, simple, and works on almost anything without ruining it. You can usually mix a few drops in warm water and just go cabinet by cabinet. It’s gentle enough for wood or laminate but surprisingly strong on fingerprints. You can try those expensive cleaners before, thinking they’d work better, and then realize they don’t.
You can even scrub a little harder without worrying about ruining the finish. Mild dish soap plus warm water is a no-brainer for cleaning and way less stressful than dealing with chemical smells.
Bucket or Spray Bottle
Buckets and spray bottles are underrated tools, honestly. You can use a bucket for washing a bunch of cabinets at once, but a spray bottle is perfect for targeting stubborn grease or small spots. You can even have a spray bottle just for vinegar mixes. It makes cleaning more controlled because you’re not dripping water all over your floor. Honestly, having either one keeps one from making a mess and makes the whole process feel easier. It’s weird how something so simple changes the cleaning game completely, but it really does.
Soft Sponge or Rag
Soft sponges and rags are essential for cleaning. People learn the hard way that scrubbing It keeps anything from rough scratches, laminate, or messing up wood finishes. You should usually have a damp sponge for cleaning and a dry rag for wiping afterward. The sponge can reach corners, edges, and small spots, while the rag makes sure everything stays wet.
It’s simple, but you will notice the difference immediately; cabinets look cleaner and last longer. You can try cleaning one small section at a time so you are not overwhelmed, and using a soft sponge keeps you from panicking about scratches.
Old Brush for Crevices
Every cabinet has those tiny spots a cloth can’t reach: nooks, corners, and edges. You grab an old toothbrush or a small brush for cleaning those areas. It’s perfect for loosening dust, crumbs, and stubborn spots. You don’t even buy a new one; any old brush works. The bristles are stiff enough to get first out but soft enough not to damage surfaces.
Skipping this step is why some cabinets always feel grimy even after cleaning. Doing the little corners really makes a huge difference in how cleaning your whole kitchen feels.
Warm Water
Warm water is basic, but it’s way more effective than cold water for cleaning. Cold just spreads grease around, and boiling water can ruin wood finishes. You can usually mix warm water with dish soap, which softens grime and makes wiping easier. It also makes rinsing sponges and cloths less of a hassle.
You will find it surprising how the right temperature of water changes everything. Warm water makes the cleaning process feel faster and more satisfying, and you can always notice a difference in how fresh the cabinets look when they’re used. Don’t skip it; it actually matters.
Preparing Your Cabinets for Cleaning
Step One: Empty them completely for cleaning. Yes, everything. It’s annoying, but cleaning around stuff is way worse. Pull out trays, spices, and boxes. Lay down a towel or newspaper on the counter or floor to catch drips.
A quick inspection also helps with cleaning: check for loose knobs, hinges, or sticky residue that needs extra attention. Minor problems now save bigger headaches later.
How to Clean Kitchen Cabinets: Step-by-Step Process
Here’s a quick method that actually works for cleaning. It takes a bit of elbow grease, but the results that come around are amazing.
Step 1: Dusting
Start with dry dusting. Microfiber cloths are best because they trap dust instead of pushing it around. Don’t forget tops, edges, and corners. Even if it doesn’t look dusty, it probably is.
Step 2: Degreasing
Grease is the real enemy. Especially near the stove. Here’s what you can do:
- Mix a few drops of mild dish soap in warm water.
- Dampen a soft cloth or sponge; don’t soak it. Too much water on wood cabinets can warp them instead of cleaning them.
- Wipe gently over the cabinet surfaces.
For this, make a baking soda paste (baking soda mixed with water), apply it to the greasy spot, let it sit for a few minutes, then wipe with a damp cloth.
Pro Tip: Laminate or thermofoil surfaces are sensitive. Don’t scrub too hard. You would peel off the corners if you scrub too hard.
Step 3: Stain Removal
Spills, fingertips, and coffee drips—they all leave marks.
- Clean Wood Cabinets: Damp cloth + mild soap + gentle rubbing. Patience is key for cleaning.
- Laminate/Thermofoil: White vinegar and warm water work great. Spray lightly, wipe, then dry immediately.
- Metal Cabinets: Soap + microfiber cloth, then wipe dry to avoid streaks.
You usually notice stains near the handles because that’s the most common area of contact. Don’t skip handles; they accumulate dirt fast.
Step 4: Cleaning Interiors
Don’t skip inside. Crumbs, dust, and old spills live there. Remove shelves if you can. Wipe interiors with a damp cloth. For drawers, don’t forget the tracks. Some learn this the hard way when they have a spice drawer with sticky residue. It can take hours of cleaning. Dry everything thoroughly before putting items back, or you will have damp boxes and sticky shelves.
Step 5: Dry and Polish
Dry everything completely. You cannot stress this enough. Moisture is wood’s worst enemy. For wood cabinets, a swipe of furniture polish or mineral oil can restore some shine. Don’t overdo it. Laminate and metal just need a dry cloth.
Removing Tough Stains and Grease
Sometimes you get spots that won’t budge. Here’s how you can tackle them:
- Water Spots: Damp cloth, then dry.
- Sticky Residue: Warm water and dish soap or vinegar solution.
- Heavy Grease: Baking soda paste, gentle scrubbing.
Avoid steel wool or harsh scrubbing pads, as they would leave scratches.
Essential Maintenance Tips for Kitchen Cabinets
Cleaning your kitchen cabinets is only one part of the story. Maintain your kitchen cabinets to keep them looking fresh.
Regular Cleaning Schedule
Try to do a quick wipe of your cabinets every week to maintain your kitchen cabinets. Weekly quick wipes with lint-free cloth, deep cleaning every 3-6 months, and keeping grease and dust from building up. Doing a little bit of cleaning regularly is good in order to maintain your kitchen cabinets. It doesn’t take long, and your kitchen feels tidy.
Inspect & Repair Hardware
Hardware gets ignored way too often during cleaning. Check knobs, handles, and hinges, tighten loose ones, and replace broken hardware to maintain your kitchen surfaces. It prevents future headaches of cleaning. Little fixes like this actually make cabinets work better and last longer.
Protect Cabinet Surfaces
Shelf liners inside cabinets, mats near the stove. Don’t place hot pans directly on wood. Keep wet items off the laminate. Little habits like this take a few seconds but save hours later. Protecting surfaces isn’t about perfection but about maintenance.
Prevent Moisture & Damage
Moisture is sneaky. Wipe spills immediately. Ventilate your kitchen whenever possible. Humidity can warp wood and peel laminate. Paying attention to moisture is probably the easiest way to keep cabinets lasting longer without spending extra money on repairs.
Refinish or Touch Up When Needed
Scratches happen. Wood can be stained or refinished. Laminate/thermofoil may need touch-up kits. It’s better to touch them up whenever you notice that they need maintenance. Here are some extra tips that really help to keep your kitchen pristine:
- Keep a small microfiber cloth handy for quick daily wipes.
- Don’t wait for giant messes. A little elbow grease now saves hours later.
- Consider small splash guards near the stove.
- Painted cabinets? Gentle wipes only on surfaces. Paint chips easily.
Conclusion
Cleaning and maintaining kitchen cabinets isn’t rocket science. It’s just about knowing your cabinet type, having the right supplies, and doing it with patience. Dust, degrease, wipe interiors, dry completely, and maintain. You don’t need perfection, just a functional, clean, and fresh-feeling kitchen.
FAQs
Here are some frequently asked questions answered for you.
How often should I deep clean my kitchen cabinets?
Depends on your kitchen use. Weekly quick wipes and deep cleaning every 3-6 months work for most people. wipes and
Can I use vinegar to clean wooden cabinets?
Yes, but don’t soak. Mix with warm water, wipe gently, then dry fast.
What is the best way to remove grease from cabinets?
Soap and hot water for most spots. Tough grease? Baking soda paste or vinegar solution.
How do I prevent sticky residue from forming on cabinets?
Wipe spills immediately. Weekly quick wipes prevent buildup. Dry surfaces completely.
What is the safest way to clean painted cabinets?
Soft cloth, warm water, and mild soap. Avoid rough scrubbing pads or harsh chemicals. Dry completely.