


How to Build a Kitchen Island: 4-Step DIY Guide with RTA Cabinets
Table of Contents
In the world of RTA (Ready-To-Assemble) cabinetry, a kitchen island isn't a pre-made furniture piece you simply drop into place. It is a custom structural configuration you build yourself by arranging cabinet boxes, panels, and molding to fit your specific layout.
In this guide, we map out the standards for clearances, the engineering behind safe installation, and the exact steps to build the kitchen island of your dreams.
Project Preparation: The Professional Tool Kit
To achieve a built-in kitchen island look, you need more than a screwdriver. Here is the professional list:
- Laser Measure or Tape: For precise floor mapping.
- Blue Painter’s Tape: To mock up the footprint on the floor (crucial for visualizing flow).
- 2.5" Cabinet Screws: Do not use drywall screws; they have low shear strength and will snap.
- 4-Foot Level & Shims: Floors are rarely level; your island must be.
- Clamps: To hold face frames tight while pre-drilling.
- 2x4 or 2x6 Lumber: For floor cleats and riser platforms.
- Power Drill and Drill Bits: Essential for pre-drilling face frames (to prevent wood splitting) and driving screws into floor cleats.
Step 1: Establish the "Empty Zone"
Before buying cabinets, you must define the Empty Zone. If your island is too big, your kitchen will fail functional inspections.
A. The 36-Inch Walkway Rule
Maintain at least 36 inches of clearance on all sides of the island for general traffic. This is the safety minimum to allow two people to pass without collision.
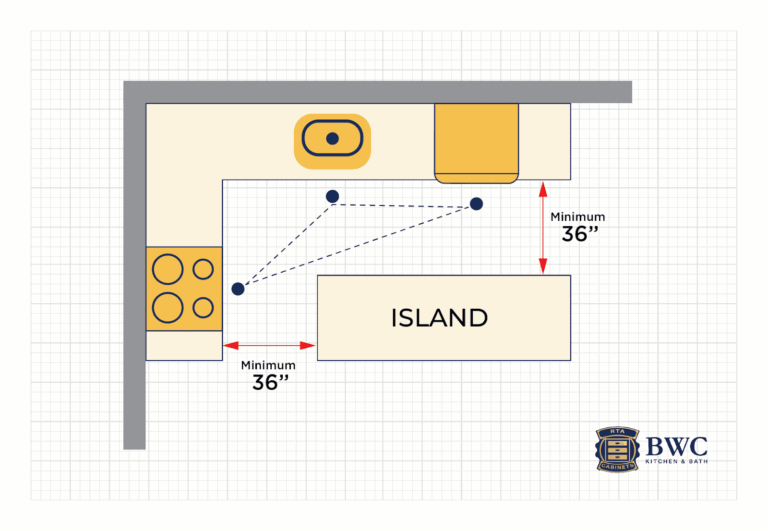
B. The Work Zone Clearance (42-48")
If your kitchen island faces the Work Triangle (stove, sink, or refrigerator), you need more space:
- 42 Inches: Minimum for a single-cook kitchen.
- 48 Inches: Required if two people cook simultaneously.
Why? You must accommodate the swing of appliance doors (oven/dishwasher) while leaving room for a person to stand behind them.
C. The Door Swing Audit
Measure the full swing radius of your fridge doors. Ensure they won't hit the kitchen island or pinch a walkway when fully open.
Pro Tip:
Use blue painter's tape to outline the proposed island size on your floor.
Leave it for 24 hours and walk the space. If you have to turn sideways to pass, the island is too big.
Step 2: Choose Kitchen Island Configuration
Once you know your maximum footprint, select a structural layout. Here are the four industry-standard configurations for RTA kitchen islands.
Option A: The Double-Depth Storage Kitchen Island (48" x 96")
Best for: Large open-concept kitchens. This is the luxury standard. Placing cabinets back-to-back doubles your storage and creates a massive prep surface.

- The Build: Place a row of standard 24" Deep Base Cabinets facing the kitchen, and a second row of 24" Deep Base Cabinets directly behind them, facing the living area.
- Total Depth: Approx. 48 inches (plus countertop overhang).
The Pro Finish:
On the living room side, block out the toe-kick area with 2x4s and cover it with Furniture Base Molding.
This makes the island look like a solid piece of furniture rather than floating kitchen cabinets.
Option B: The Hybrid Kitchen Island with Seating (36" Depth)
Best for: Kitchens requiring bar seating.
This saves space by using shallow cabinets on the back, creating a recessed area for knees under the countertop.
- The Build: Use standard 24" Deep Base Cabinets on the front and 12" Deep Wall Cabinets on the back.
- Total Depth: 36 inches.
The Height Problem: Build a Riser Platform
Standard wall cabinets are 30" high, while base cabinets are 34.5" high. To match them, you must elevate the wall cabinets.
- Calculate the Gap: 34.5" (Base Target) - 30" (Wall Cabinet) = 4.5" Rise Needed.
- Build the Ladder: Rip-cut 2x6 lumber to exactly 4.5 inches wide using a table saw. Build a "ladder frame" that matches the footprint of your cabinets.
The Side Finish: The Flush Skin Rule
If you plan to install a Wall Decorative Panel (WDEP) to finish the exposed ends of kitchen island, the installation method depends entirely on your cabinet construction type.
- For Framed Cabinets:
- The Issue: Framed cabinets have a face frame that overhangs the side panel by 1/4 inch. You cannot glue a decorative panel over this gap.
- The Fix: You must order a Base Skin Veneer (BSV). Apply the BSV first to flush the side surface with the face frame. Once flush, glue the BDEP directly onto the skin.
- For Frameless Cabinets:
- The Standard: Typically, frameless cabinets have flush sides, so you can apply the Base Decorative Panel directly to the cabinet box without a skin.
The Exception: If you are using a Universal Box style (such as the High Gloss White), the sides may not be finished or flush. In these specific cases, you must treat them like framed cabinets: apply a Finished Skin first to create a clean surface, then install the decorative panel.
Option C: The Slim Kitchen Island
Best for: Narrow galleys or tight walkways.
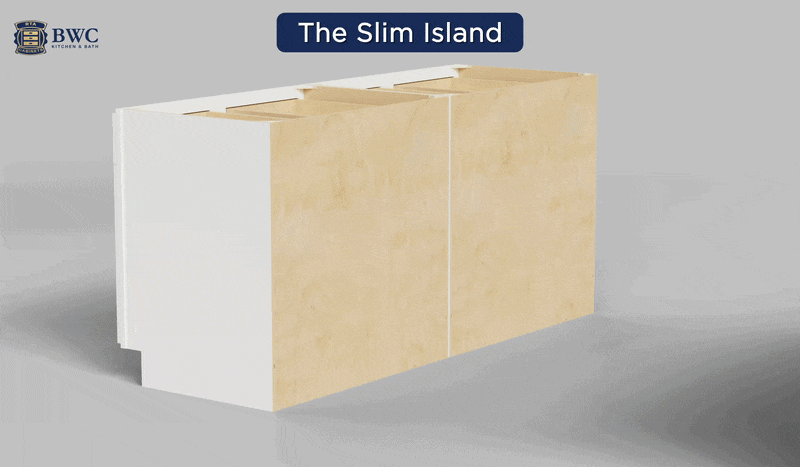
The Build: Use a single row of 24" Deep Base Cabinets.
The Finish: The backs of cabinets are raw plywood. You must apply a finished Island Panel (skin) using construction adhesive and pin nails. Cover the raw corners with Outside Corner Molding (OCM).
Option D: The L-Shaped Kitchen Island
Best for: Defining the kitchen zone in open layouts.
If you want to separate your cooking area from your living room without building a wall, this is the solution. It provides massive seating space on two sides, perfect for conversation.
- The Build: This requires a specific corner piece. Start with a Base Corner Cabinet (like a Lazy Susan or Blind Corner) as your anchor. Then, extend standard 24" Deep Base Cabinets outward from both sides of the corner to create the "L" shape.
- The Benefit: It naturally creates a "Cockpit" feel for the cook, putting everything within arm's reach while keeping guests on the outer perimeter.
- Pro Detail: Cover the raw corners where the panel meets the side with Outside Corner Molding (OCM) for a polished look.
Optimize Functionality: What Goes Inside a Kitchen Island?
Since the kitchen island is your primary prep zone, upgrade the cabinets to solve common kitchen headaches.
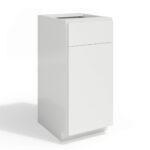
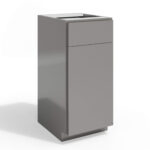
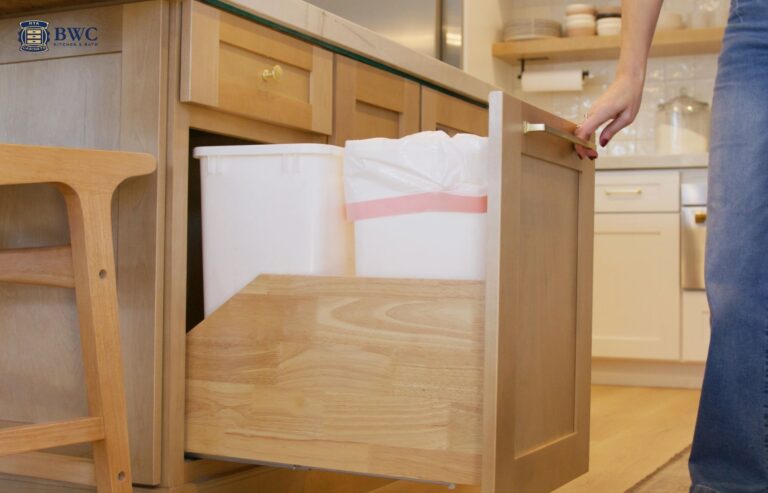
- The Hidden Trash Bin
The island is where you chop vegetables and prepare meals. You do not want to walk across the kitchen with dripping food waste.
- The Upgrade: Swap one standard 18" or 21" base cabinet for a Trash Pull-Out Base. Ideally, place this to the right of your sink (if the island has one) or closest to your main chopping area.
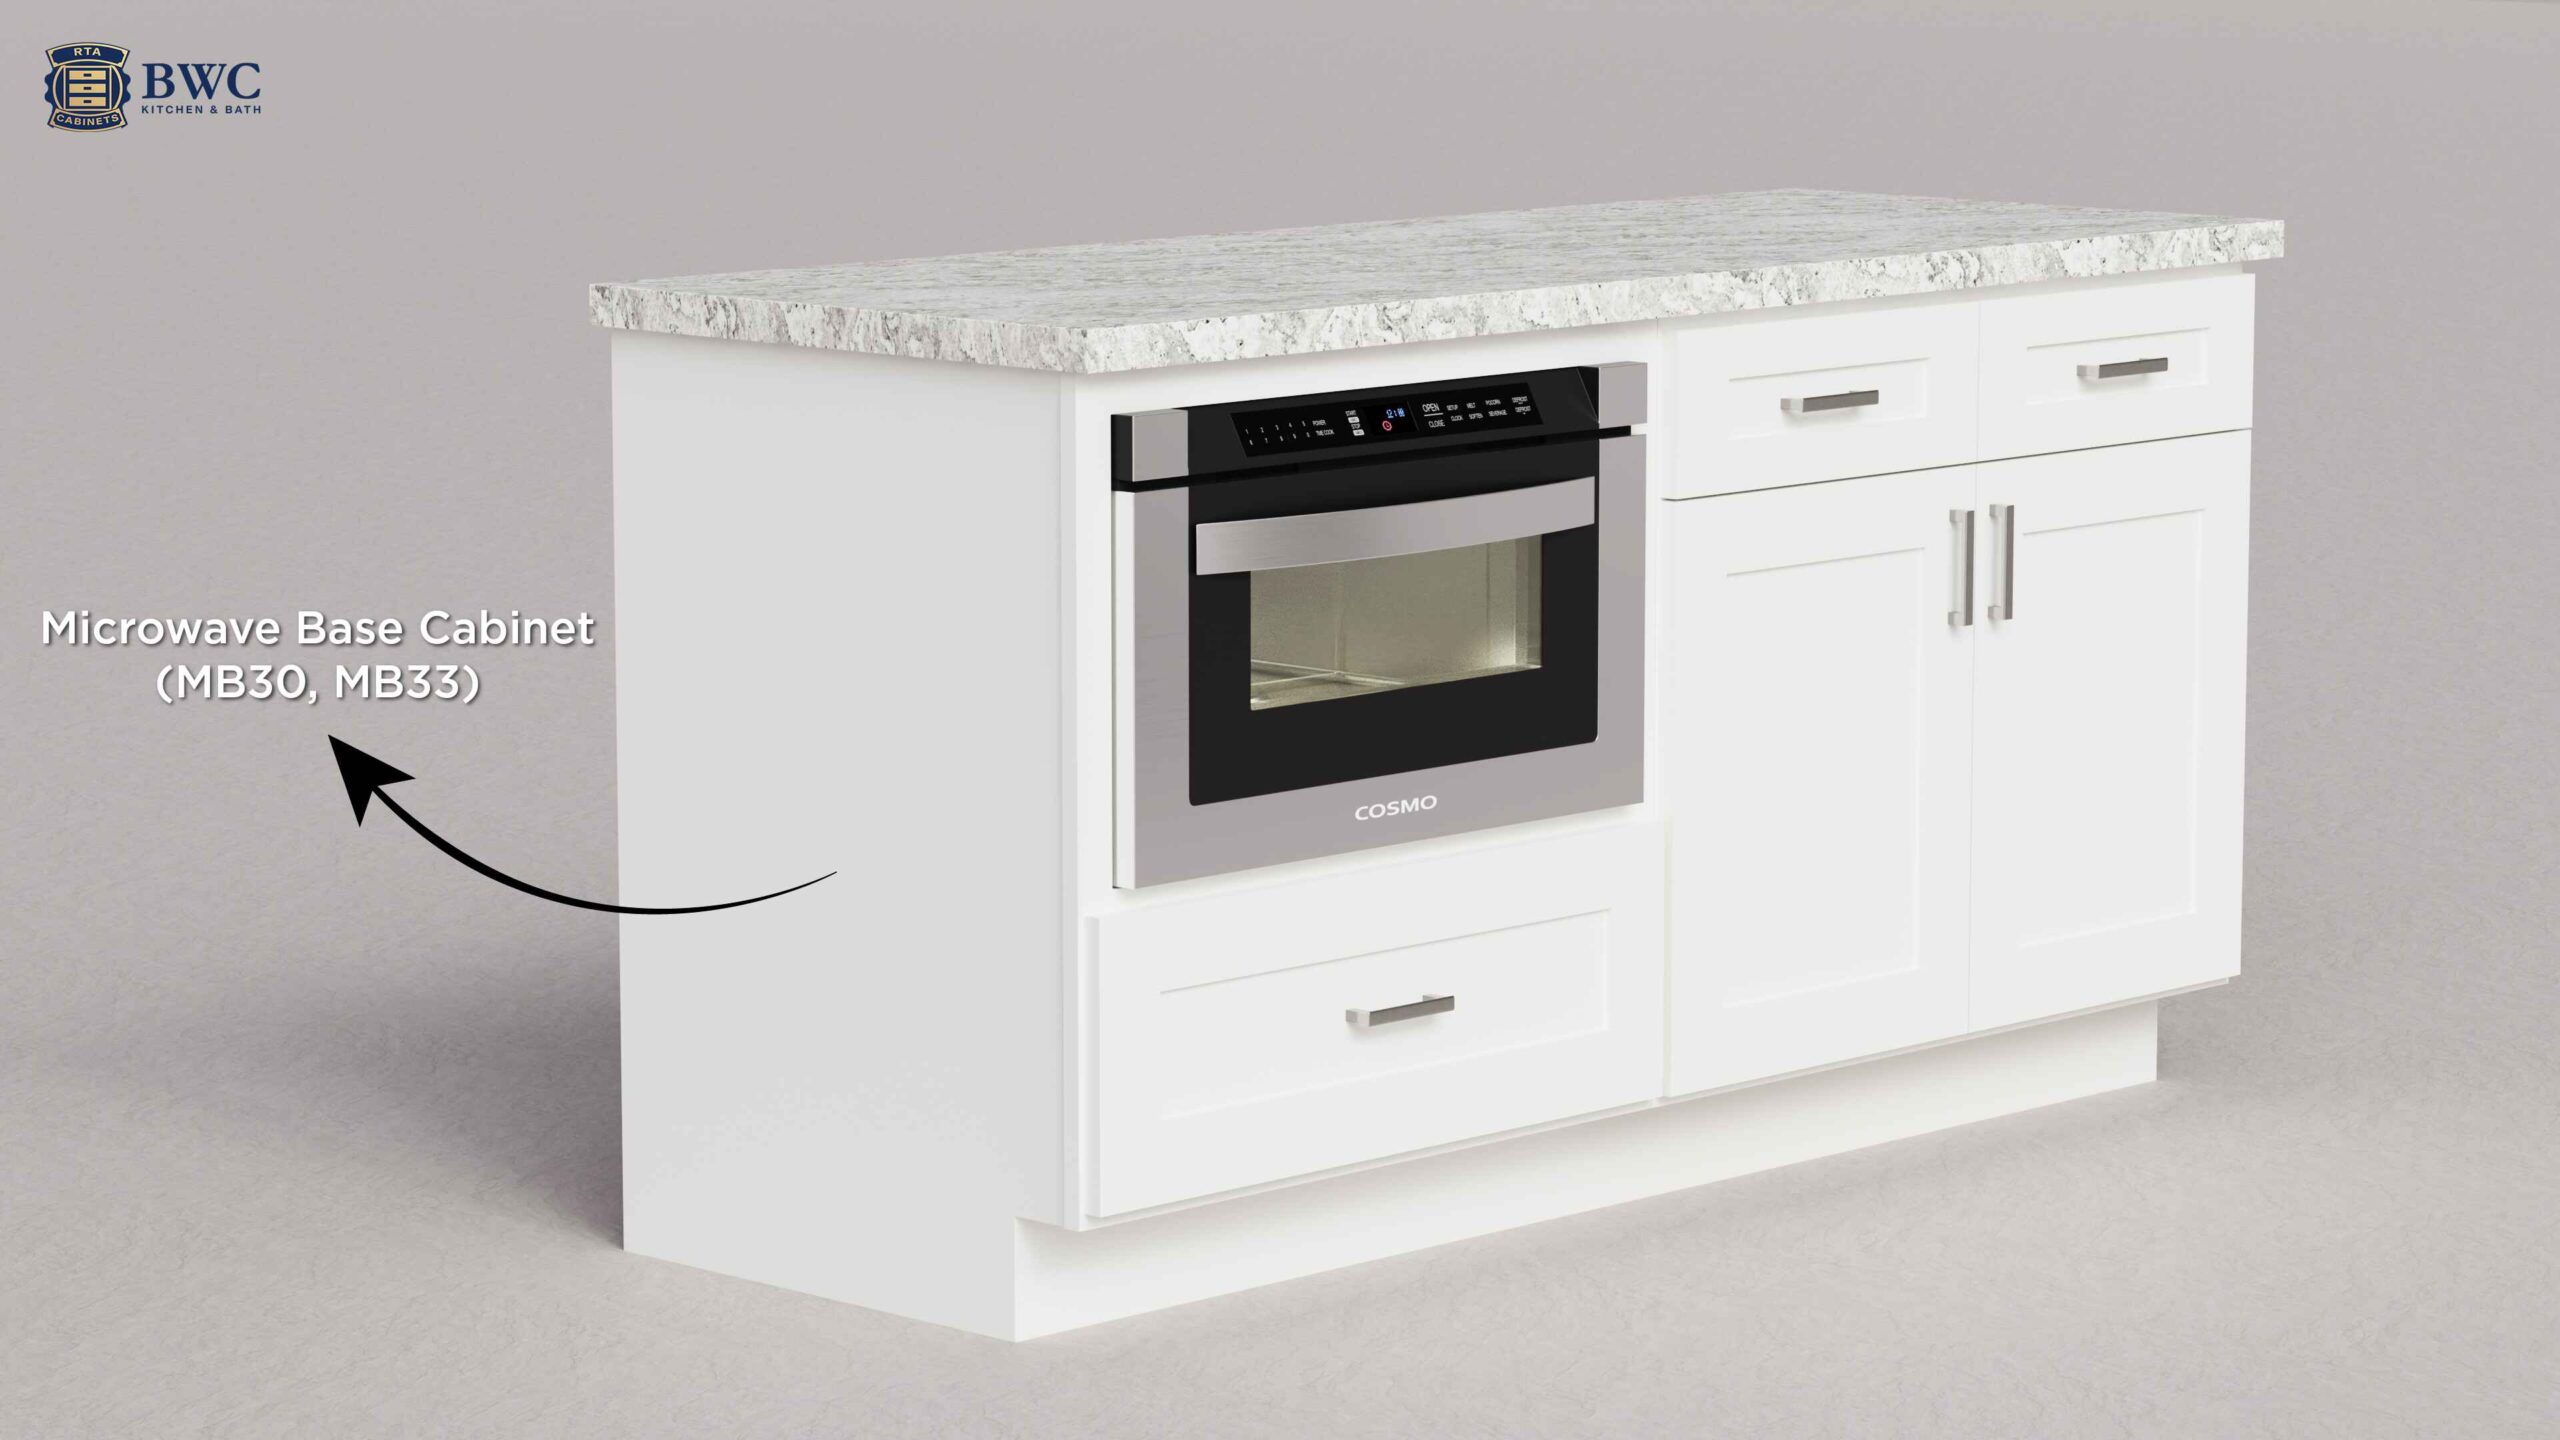
- The Built-In Microwave
Microwaves are bulky and eat up valuable counter space.
- The Upgrade: Use a Microwave Base Cabinet. This specialized unit has a finished opening designed to house a standard countertop microwave, tucking it neatly under the counter for a custom, built-in look.
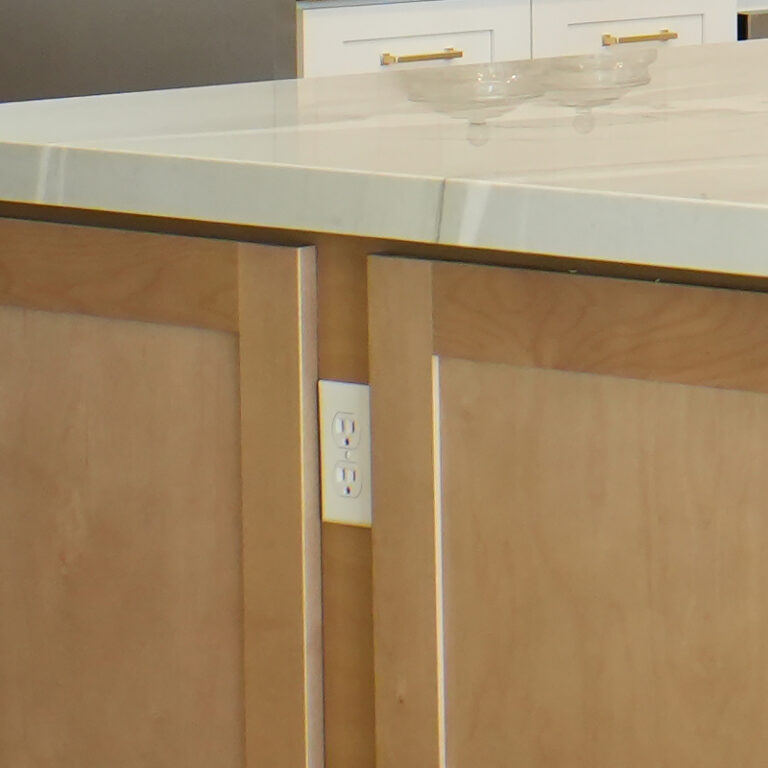
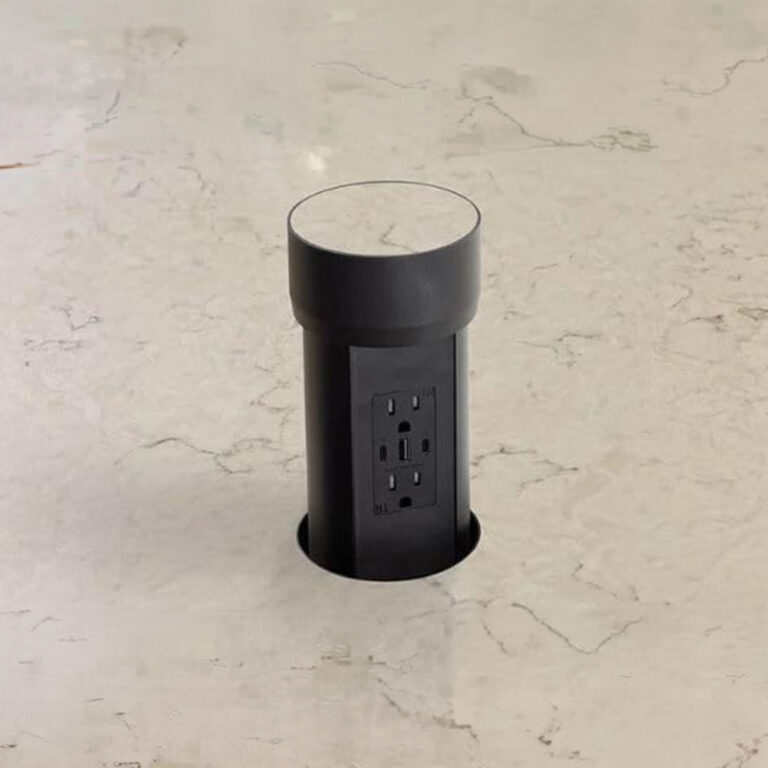
- Outlet Placement Strategy
Since RTA cabinets don't come with pre-drilled electrical holes, you have two stylish options for your required outlets:
- The Side Panel Mount: The most common method. Your electrician cuts a hole in the decorative side panel (near the top edge) using a "rework box."
- The Pop-Up Tower: For a cleaner look, install a retractable pop-up outlet directly into the countertop surface. This keeps the cabinet sides smooth and unbroken.
Step 3: Kitchen Island Safety and Code Compliance
Don't cut corners here - this often-overlooked step is the key to a professional-grade result
- Anchoring the Island (Anti-Tip Protocol)
An island is a freestanding structure. If not secured, it can slide or tip when drawers are fully loaded and opened.
- The Method: Screw 2x4 wooden "cleats" into your floor (through the tile/wood into the subfloor) so they fit inside the cabinet's bottom void.
- The Install: Place the cabinet boxes over the cleats. Drive 2.5" screws through the recessed toe-kick plate into the 2x4s. Since the toe kick is recessed, these screws are hidden from normal view.

- Electrical Code Requirements
Electrical codes often require at least one electrical outlet on fixed islands to prevent trip hazards.
Professional Note: While the newest 2023 NEC guidelines have relaxed this mandate, many local municipalities still enforce the requirement. Always verify with your local electrician.
The Tip:
Before installing cabinets, hire an electrician to run conduit up through the floor. Cut the access holes in the floor of your cabinet base before you screw it down.
Step 4: Measuring Kitchen Island Countertops and Overhangs
The stone slab is the heaviest part of the project. Calculating the "Total Footprint" ensures safety and fit.
Seating Overhang Rules
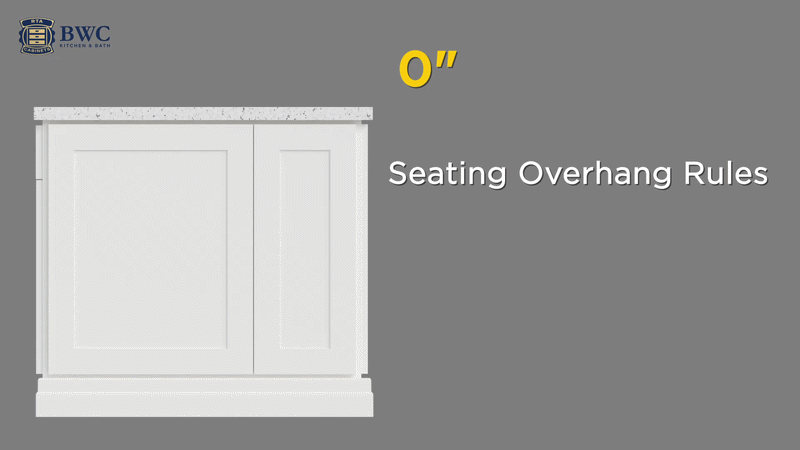
| Minimum Knee Space | 10 inches |
| Standard Comfort | 12 inches |
| Luxury | 15 inches |
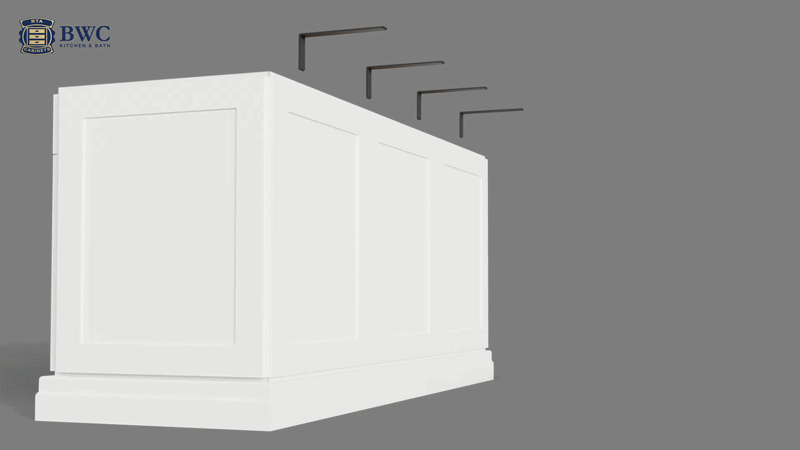
Kitchen Island Countertop Support Rule
⚠️Warning: Granite and Quartz are brittle. You cannot let stone float unsupported.
- Rule of Thumb: Any overhang exceeding 10 inches requires structural support.
- The Solution:
- Hidden: Use flat steel support bars mounted to the top of the cabinet box before the countertop is installed.
- Decorative: Use wooden corbels or legs if you want a traditional look.
Bonus: Kitchen Island Customization Hacks
Make your RTA Kitchen Island look like a $10,000 custom piece.
- Furniture Base Molding: Wrap the bottom with detailed molding instead of a standard recessed toe kick. This mimics a standalone furniture piece.
- Decorative End Panels: Attach "Dummy Doors" (non-functional doors) to the sides or back panel to add texture and match the front profile.
Budget Watch: 3 Ways to Cut Costs When Building Kitchen Island
Building a custom kitchen island doesn't have to break the bank. Here is how to balance your budget like a pro:
- The "Mix and Match" Strategy
Drawer bases are the gold standard for kitchen storage (and worth the investment!), but they do cost more than standard door cabinets.
- The Smart Move: Don't cut out drawers entirely. Instead, place Drawer Bases in your primary "Work Zone" (where you need quick access to tools) and use affordable Door Cabinets on the less-active side of the island. You get the luxury function where it counts without overspending.
- Hunt for "Stone Remnants"
You rarely need a full slab of granite or quartz for an island.
- The Save: Since islands are smaller than full kitchens, you can often score a luxury piece of exotic stone for 50% off because it’s considered "scrap" to the fabricator.
- Stick to Standard Sizes
Custom modifications cost money.
- The Save: Design your island using standard widths (18", 24", 30", 36"). If you have a 3-inch gap, use a Filler Strip rather than ordering a custom-sized cabinet. This simple switch can save you hundreds per cabinet.
FAQ
What is the "3x4 Rule" for kitchens?
This is a designer’s shorthand for clearances: 3 feet (36″) minimum for walkways and 4 feet (48″) ideal work zone width for multi-cook kitchens. It is the golden ratio for function vs. congestion.
How much does a DIY island cost vs. Pre-made?
A DIY island using high-quality RTA plywood cabinets typically costs $600 – $1,500 for the boxes and panels. A comparable pre-made custom island from a showroom often starts at $3,000+. The DIY savings are significant if you have the skills.
Do I need a permit to build a kitchen island?
If you are adding electrical or plumbing to the island (which is often required by code), yes, you typically need a permit for those trades. If it is purely storage (and your local code allows it without power), you may not. Always check local building codes.
Do I need to order special parts for the back of the island?
Yes. Standard base cabinets are designed to be placed against a wall, so their backs are usually unfinished raw plywood. You must order a finished “Island Panel” (or skin) and “Outside Corner Molding” to cover the raw back and corners for a polished look.
Should I install the island on top of my flooring?
It depends on the floor type.
- Tile/Hardwood: Yes, you can install cabinets on top.
- Floating Floors (LVP/Laminate): NO. You should generally install the island on the subfloor before laying floating floors. Heavy islands can “pin” floating planks down, preventing them from expanding/contracting, which causes buckling.